Best Practices for Solar Panel Weatherproofing
Learn essential weatherproofing techniques to extend the lifespan of your solar panels, ensuring durability against harsh environmental conditions.

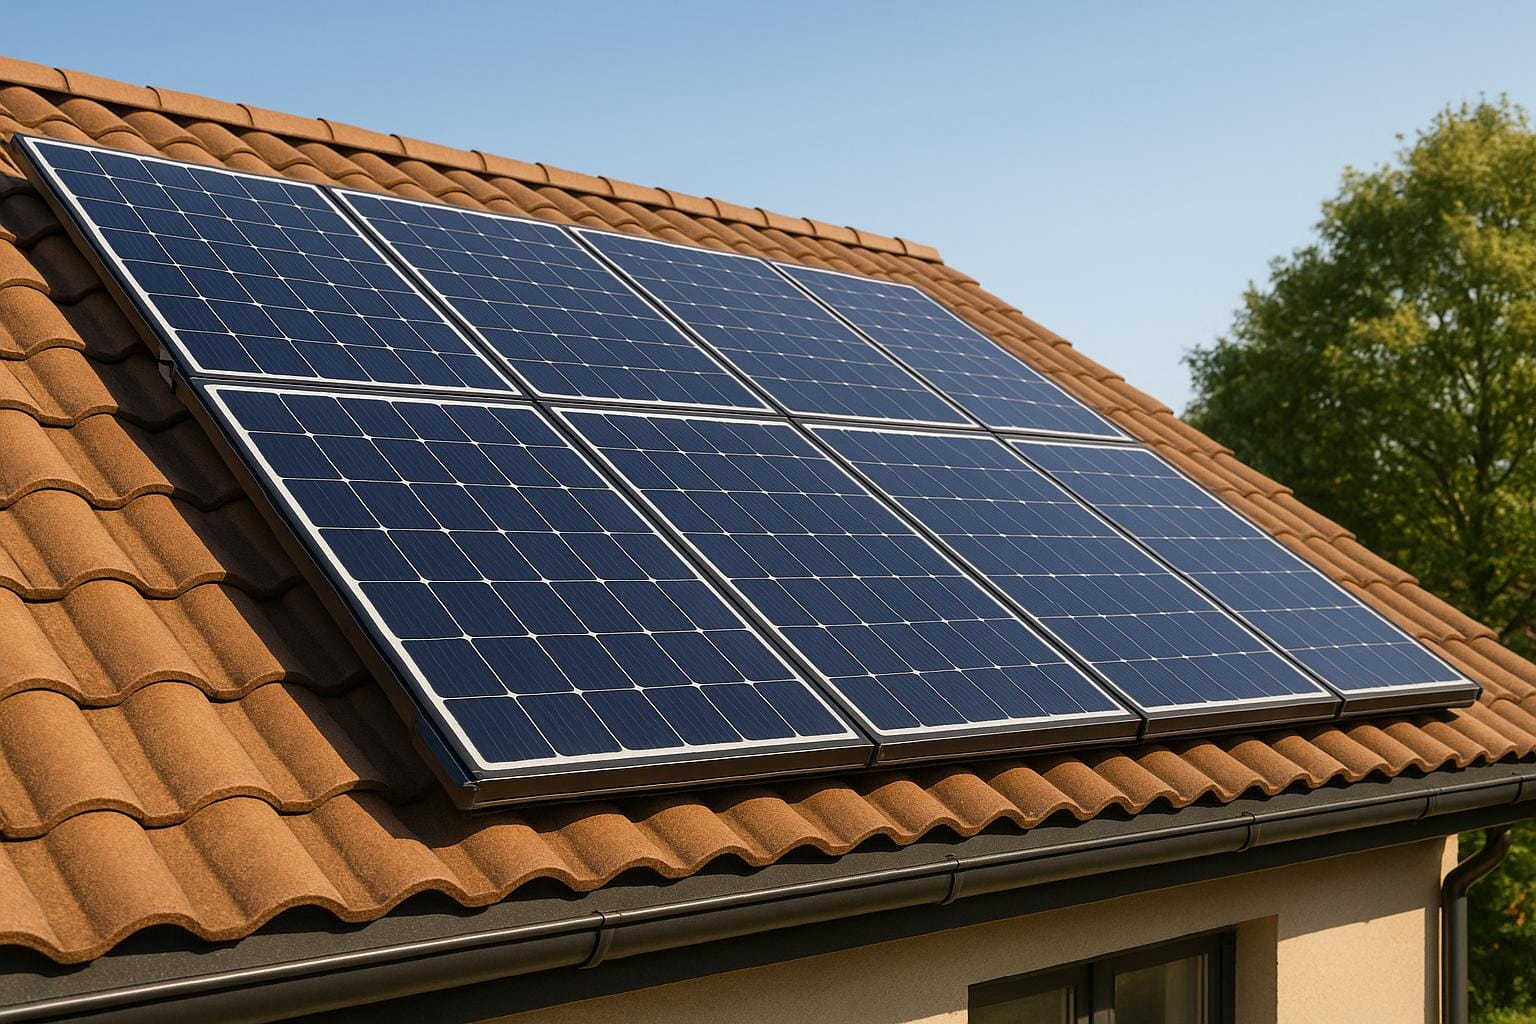
Want your solar panels to last 25+ years? Proper weatherproofing is the key. Without it, weather exposure can cut their lifespan to just 5-10 years. Here’s what you need to know to protect your investment:
-
Weather Challenges & Solutions:
- Rain: Use waterproof sealing to prevent corrosion.
- Wind: Secure panels with strong mounting systems.
- Hail: Opt for impact-resistant tempered glass.
- Temperature Changes: Use flexible seals to handle expansion and contraction.
-
Choose Weather-Resistant Panels:
- Materials: Tempered glass (3.2 mm+), anodized aluminum frames, UV-resistant back sheets.
- Certifications: Look for IEC 61215 for durability against wind, hail, and temperature shifts.
-
Install a Reliable Mounting System:
- Roof mounts: Anchor systems for high winds, proper flashing for water resistance.
- Ground mounts: Concrete foundations below frost lines and corrosion-resistant hardware.
-
Protect Electrical Components:
- Use NEMA 4X/IP65 enclosures, UV-resistant cables, and surge protection devices.
- Maintain Regularly: Inspect seals, mounting hardware, and electrical systems twice a year and after extreme weather.
Quick Tip: Spend 5-10% of installation costs on weatherproofing to boost returns by 15-25%. A small upfront investment ensures long-term durability and efficiency.
The Best Solar Waterproofing Materials & Methods
Weather-Resistant Panel Selection
Picking the right weather-resistant solar panels involves looking closely at the materials, build quality, and safety certifications. These factors play a big role in ensuring the panels last longer and perform well, even in tough weather conditions.
Panel Materials and Construction
The materials used in solar panels are crucial for handling harsh weather.
A solid foundation for weather resistance starts with durable construction. For example, tempered glass is essential for impact resistance. Panels should have at least 3.2 mm (0.13 in.) tempered glass, which has been shown to withstand hailstorms effectively. A 2023 study in County Galway backed this up, showing that 3.2 mm tempered glass held up against severe hailstorms.
High-quality panels also feature anodized aluminum frames, which offer several benefits:
| Feature | Benefit | Performance Impact |
|---|---|---|
| Corrosion Resistance | Protects against salt spray damage | Maintains structural durability |
| Structural Integrity | Keeps panels stable | Ensures stability in strong winds |
| Weather Sealing | Blocks moisture from entering | Reduces the risk of internal damage |
In addition, modern panels incorporate encapsulants and UV-resistant back sheets. These components help prevent moisture damage and degradation from prolonged sun exposure.
Required Safety Ratings
Safety certifications are critical for ensuring a panel's durability and reliability. Panels certified under IEC 61215 meet rigorous mechanical load tests. For example, a basic wind resistance rating requires panels to handle an uplift of at least 2,400 Pa, but for areas near the coast, a higher rating of 5,400 Pa is recommended. The IEC 61215 certification also evaluates panels for hail impact resistance and their ability to endure temperature fluctuations.
Panels meeting these recognized standards are often eligible for government grants and incentives, highlighting their reliability and long-term performance.
Models like the First Solar Series 6 and MiaSolé Hi-Tech modules are prime examples of panels designed to endure challenging climates, thanks to their advanced construction and adherence to these standards.
Mounting System Requirements
A reliable mounting system is essential for safeguarding solar panels and ensuring they perform consistently over time.
Roof Mount Installation
The choice between a ballasted or anchored roof mount depends on your roof type and local weather conditions. For areas prone to high winds, anchored systems are typically the better option, offering stability against wind speeds of up to 120 mph when installed correctly.
Key components of roof mounting systems include:
- Attachment Points: These should be spaced every 4–6 feet to minimize the risk of wind uplift.
- Edge Setbacks: Maintain at least a 3-foot setback from roof edges to reduce exposure to strong gusts.
- Rail Spacing: Rails should be spaced about 4 feet apart to enhance overall stability.
- Panel Height: Panels should be elevated 3–4 inches above the roof surface to allow for proper airflow.
Proper flashing is crucial to seal any roof penetrations. Most modern installations use integrated flashing systems, which typically include:
- Pre-fabricated aluminum or galvanized steel base plates.
- EPDM rubber gaskets to create a watertight seal.
- UV-resistant polyurethane sealants with a lifespan of 25 years or more.
For installations in wet climates, flashing systems with built-in water channels are recommended. These channels help direct water away from vulnerable areas. To maintain effectiveness, seals should be inspected twice a year - once before winter and again after spring.
While ground-mounted systems share some weather-related challenges with roof mounts, they require different foundation solutions.
Ground Mount Setup
For ground-mounted panels, concrete foundations must meet specific criteria:
- Be installed 18–24 inches below the frost line.
- Use concrete with a compressive strength of 3,000–4,000 psi.
- Include reinforcement with #4 or #5 rebar arranged in a grid pattern.
Position ground-mounted panels at a 35° tilt to maximize efficiency and durability. This angle supports:
- Snow Shedding: Encourages snow to slide off naturally.
- Rain Runoff: Prevents water from pooling on the panels.
- Maximum Sun Exposure: Improves energy production by optimizing sunlight capture.
- Debris Prevention: Reduces buildup of leaves, dirt, and other materials.
All mounting hardware should be either hot-dip galvanized or made from stainless steel to resist corrosion, especially in humid environments. To further protect the foundation, consider adding drainage channels or gravel beds around foundation points. These features help manage water runoff and prevent potential damage to the foundation over time.
Electrical Component Protection
Ensuring the proper protection of electrical components is just as important as following robust mounting practices. Both are essential for maintaining system performance and ensuring safety.
Waterproof Housing and Wiring
Start by using enclosures rated NEMA 4X or IP65 for all inverters and junction boxes. These enclosures should be made from durable materials like stainless steel, fiberglass-reinforced polyester, or high-grade, UV-stabilized polymers to withstand harsh conditions.
For wiring, opt for double-insulated, UV-resistant PV cables that meet the following specifications:
| Cable Component | Required Specification |
|---|---|
| Insulation Type | XLPE or EPDM |
| Temperature Rating | -40°F to +194°F |
| UV Protection | Mandatory |
| Certification | TÜV Standard |
| Conduit Material | PVC with UV inhibitors or HDPE |
Install conduits with a slight downward slope and include drain holes at the lowest points. Use IP65-rated weatherproof grommets and seal all entry points to prevent water ingress. Once the wiring is secure, electrical safety systems can further shield the installation from weather-related issues.
Electrical Safety Systems
Modern systems rely on multiple layers of electrical protection to guard against faults caused by weather. Key safety components include:
- Rapid Shutdown Systems: Allow for quick de-energizing in emergencies.
- Arc Fault Circuit Interrupters (AFCIs): Detect and interrupt dangerous electrical arcs.
- Ground Fault Protection Devices (GFPDs): Reduce the risk of shocks from moisture exposure.
- Surge Protection Devices (SPDs): Protect the system from lightning strikes and power surges.
For effective lightning protection, use a multi-level strategy:
| Protection Level | Component | Purpose |
|---|---|---|
| Primary | Type 1+2 SPDs | Protects the main distribution board |
| Secondary | Type 2 SPDs | Safeguards inverter input/output |
| Tertiary | Type 3 SPDs | Shields sensitive equipment |
| Physical | Air Terminals | Establishes a protective zone over the array |
Maintenance Practices
Regular maintenance is vital for ensuring long-term protection. Include the following in your routine:
- Inspect enclosures twice a year for water ingress or degraded seals.
- Test the resistance of electrical connections.
- Reapply dielectric grease every 2–3 years.
- Keep detailed maintenance records.
For wiring connections, use marine-grade, tin-plated copper or stainless steel connectors. Always crimp MC4 connectors instead of soldering them, as crimped connections handle temperature changes more reliably.
These steps help ensure the system remains safeguarded against environmental and electrical challenges.
Storm and Weather Protection
Solar installations need to be prepared for harsh weather conditions to ensure they continue to perform efficiently and remain durable over time.
Hail and Storm Safety
High-quality solar panels, built with tempered glass thicker than 3.2 mm, are designed to endure hailstones up to 1 inch in diameter traveling at terminal velocity. To further protect your system during storms, consider these key components:
| Protection Level | Component | Purpose |
|---|---|---|
| Primary | Impact-Resistant Glass | Protects photovoltaic cells from hail damage |
| Secondary | Reinforced Frame | Maintains structural integrity in high winds |
| Tertiary | Protective Coating | Adds an extra layer of impact resistance |
| Emergency | Automated Tilt System | Adjusts panel angles during severe weather |
After a major storm, follow these steps to assess potential damage:
- Visual Check: Use binoculars from the ground to spot visible cracks or damage.
- Performance Monitoring: Check your inverter readings for unusual drops in efficiency.
- Professional Inspection: If you suspect damage, have a certified technician inspect your system.
Keep in mind that during overcast weather, solar panels typically generate only 10% to 25% of their maximum output. While hail and wind protection are crucial, managing snow accumulation is equally important for maintaining efficiency.
Snow Removal Systems
Once storm safety measures are in place, addressing snow buildup becomes essential for optimal energy production. Installing panels at a tilt of 30–40° helps snow slide off naturally while still ensuring efficient energy capture. To further manage snow, consider these systems:
| System Type | Features | Benefits |
|---|---|---|
| Passive Thermal | Dark-colored frames | Promotes natural heat absorption |
| Active Heating | Built-in warming elements | Allows controlled snow melting |
| Automated Cleaning | Programmable sprayers | Enables scheduled snow removal |
Avoid manually clearing snow from roof-mounted panels, as this can cause damage. Instead, let the snow melt naturally or use appropriate tools for ground-level systems. For ground-mounted setups, elevated mounting structures can help prevent flooding, make snow removal easier, and ensure proper drainage.
Waterproofing Methods
Waterproofing plays a key role in protecting solar panel installations from moisture damage, ensuring they remain reliable over time. The durability of the system largely depends on the sealing materials and techniques used during installation.
Sealing Materials
Modified Silicone (MS) polymer sealants stand out as a durable option compared to traditional choices. These sealants can last 15–20 years, thanks to their excellent UV resistance and flexibility.
| Sealant Type | Lifespan | Best Application | Performance in Rain |
|---|---|---|---|
| MS Polymer | 15–20 years | All mounting points | Excellent water resistance |
| Standard Silicone | 5–10 years | Non-critical areas | Good, but degrades faster |
| Fluoropolymer | 10–15 years | Coastal installations | Superior salt spray resistance |
| Hybrid Sealants | 8–12 years | Moderate rainfall zones | Very good water resistance |
For an added layer of protection, hydrophobic nano-coatings can be applied to the panel surfaces. These coatings create a water-repellent layer, causing rainwater to bead and slide off. However, they typically need reapplication every 3–5 years to remain effective.
Roof Penetration Sealing
Once the appropriate sealing materials are chosen, the next focus is properly sealing roof penetrations. A multi-layer approach ensures complete waterproofing while maintaining the roof's structural integrity.
-
Primary Flashing Layer
Begin with a base flashing made of EPDM rubber or TPO, extending at least 6 inches beyond the mounting brackets. This layer conforms to the roof’s contours and acts as the first line of defense against water. -
Secondary Protection
Add metal flashing as needed, depending on the roof type:- Lead or aluminum for standard roofs
- Copper for high-end installations
- Specialized flashing plates for slate or tile roofs
-
Final Sealing
Finish the waterproofing process with these steps:- Use compression fittings with neoprene gaskets at penetration points.
- Apply continuous beads of UV-resistant MS polymer sealant around edges and test for water ingress.
- Ensure at least 4 inches of clearance between the panels and roof to allow proper water drainage.
To maintain optimal performance, it’s wise to reapply a sealant refresher every 5–7 years, even if no visible wear is evident. Regular inspections are crucial, particularly after severe weather. Professional maintenance teams may use thermal imaging to spot hidden water ingress, enabling early repairs and extending the system's lifespan.
Building Code Requirements
Solar installations in Ireland must adhere to building codes that ensure both safety and durability. These regulations are in place to protect the installation, the building it’s attached to, and to maintain system reliability. Following these codes is also essential for qualifying for government incentives.
Safety Standards
The NSAI Agrément certification confirms that solar systems meet Ireland’s stringent weatherproofing requirements. For instance, various components must meet specific ratings:
| Rating Category | Minimum Requirement | Application |
|---|---|---|
| Water Resistance | IP65 or higher | Electrical components |
| Wind Load Rating | 75–87 mph | Mounting systems (standard setups) |
| Hail Impact | Standard panel impact resistance | Panel surfaces |
In coastal areas, where environmental conditions are more challenging, additional precautions are necessary:
- Use of marine-grade stainless steel or aluminum parts
- Mounting systems designed to handle 30–50% higher wind loads
- Enhanced grounding systems to improve protection against lightning
- Extra anchoring points for roof-mounted systems
Grant Requirements
Meeting these standards is crucial for obtaining government grants. The process involves specific documentation and verification steps:
- Installation Documentation: This includes detailed mounting plans, structural calculations, and NSAI Agrément certificates, along with electrical schematics that outline weatherproofing measures.
- Weatherproofing Verification: Proof of effective drainage systems, corrosion-resistant materials, and a design lifespan of at least 20 years for weatherproofing must be provided.
- Professional Certification: Key certifications include an ETCI completion certificate after an approved electrical inspection, building control inspection approval, and verification by an SEAI-approved inspector. Installers must also submit a signed declaration of compliance.
All outdoor electrical components must have proper Ingress Protection (IP) ratings and be enclosed in UV-resistant, weatherproof conduits with adequate drainage. Junction boxes, connectors, and inverters must meet outdoor specifications to ensure consistent performance in wet conditions.
To maintain these standards, certified professionals should inspect the installations regularly - typically once a year and after extreme weather events. These inspections ensure the system’s weatherproofing measures remain effective throughout its lifespan.
Summary
Maximizing the lifespan of solar panels requires thorough weatherproofing, which combines durable panel construction, secure mounting systems, and sealed electrical components. Here's a quick breakdown of the key strategies discussed earlier.
Modern solar panels are built to withstand harsh conditions, thanks to advanced materials that protect against moisture and temperature fluctuations.
Here’s a closer look at the essential components:
| Component | Key Attributes | Purpose |
|---|---|---|
| Panel Construction | Tempered glass, aluminum frames | Shields against impact and corrosion |
| Mounting Hardware | Marine-grade stainless steel | Resists rust and wear over time |
| Electrical Protection | IP65+ rated enclosures | Blocks moisture from damaging circuits |
| Roof Integration | Waterproof flashing, membranes | Keeps water from seeping into the roof |
A well-designed system ensures steady energy production even in challenging weather, highlighting the value of comprehensive weatherproofing.
To maintain performance and extend durability, regular inspections are essential. These should focus on checking the seals, ensuring mounting hardware remains secure, and verifying the condition of electrical enclosures. Following local building codes and safety standards not only boosts system longevity but can also qualify your setup for grants and incentives.
FAQs
How can I check if my solar panels are certified for weather resistance under IEC 61215 standards?
To determine if your solar panels meet the IEC 61215 certification for weather resistance, take a look at the product documentation or the label provided by the manufacturer. This certification guarantees that the panels have been tested to handle different environmental challenges like wind, rain, and temperature shifts.
If this information isn't readily available, reach out to the manufacturer or your installer. They can confirm whether your panels adhere to IEC 61215 standards and share more details about their ability to withstand various weather conditions.
How can I ensure my solar panels stay weatherproof, especially after severe weather conditions?
To keep your solar panels weather-resistant over time, especially after severe weather events, follow these essential steps:
- Inspect your panels regularly: After storms or strong winds, look for visible issues like cracks, loose mounts, or debris accumulation.
- Clean them gently: Clear away dirt, leaves, and any debris that could affect the seals or reduce the panels' efficiency.
- Examine seals and mounts: Check that the seals around the panels and the mounting hardware remain secure to block water or moisture from getting in.
If you spot any damage or problems, it’s wise to reach out to a professional for repairs. Taking these proactive measures will ensure your solar panels stay efficient and durable, even in tough weather conditions.
How does weatherproofing solar panels improve their efficiency and financial benefits over time?
Proper weatherproofing plays a key role in keeping solar panels efficient and durable over the long haul. By shielding panels from tough weather conditions - like heavy rain, snow, and strong winds - it helps protect critical parts such as wiring, seals, and the panel surface. This protection ensures your panels keep delivering energy reliably, even in tough climates.
From a cost standpoint, weatherproofing is a smart move. It lowers the chances of expensive repairs or replacements and helps maintain your solar system's energy output. This means you’ll get more value from your investment. Over time, it can translate into bigger savings on energy bills and a stronger return on your investment, especially in areas prone to frequent or severe weather.
Related posts
Stop Overpaying for Electricity in 2026
Irish homeowners are saving thousands with the €2,400 SEAI grant and 0% VAT. Get 3 free quotes from vetted, SEAI-approved installers.
Your data is secure. We only share with top-rated SEAI-approved installers.