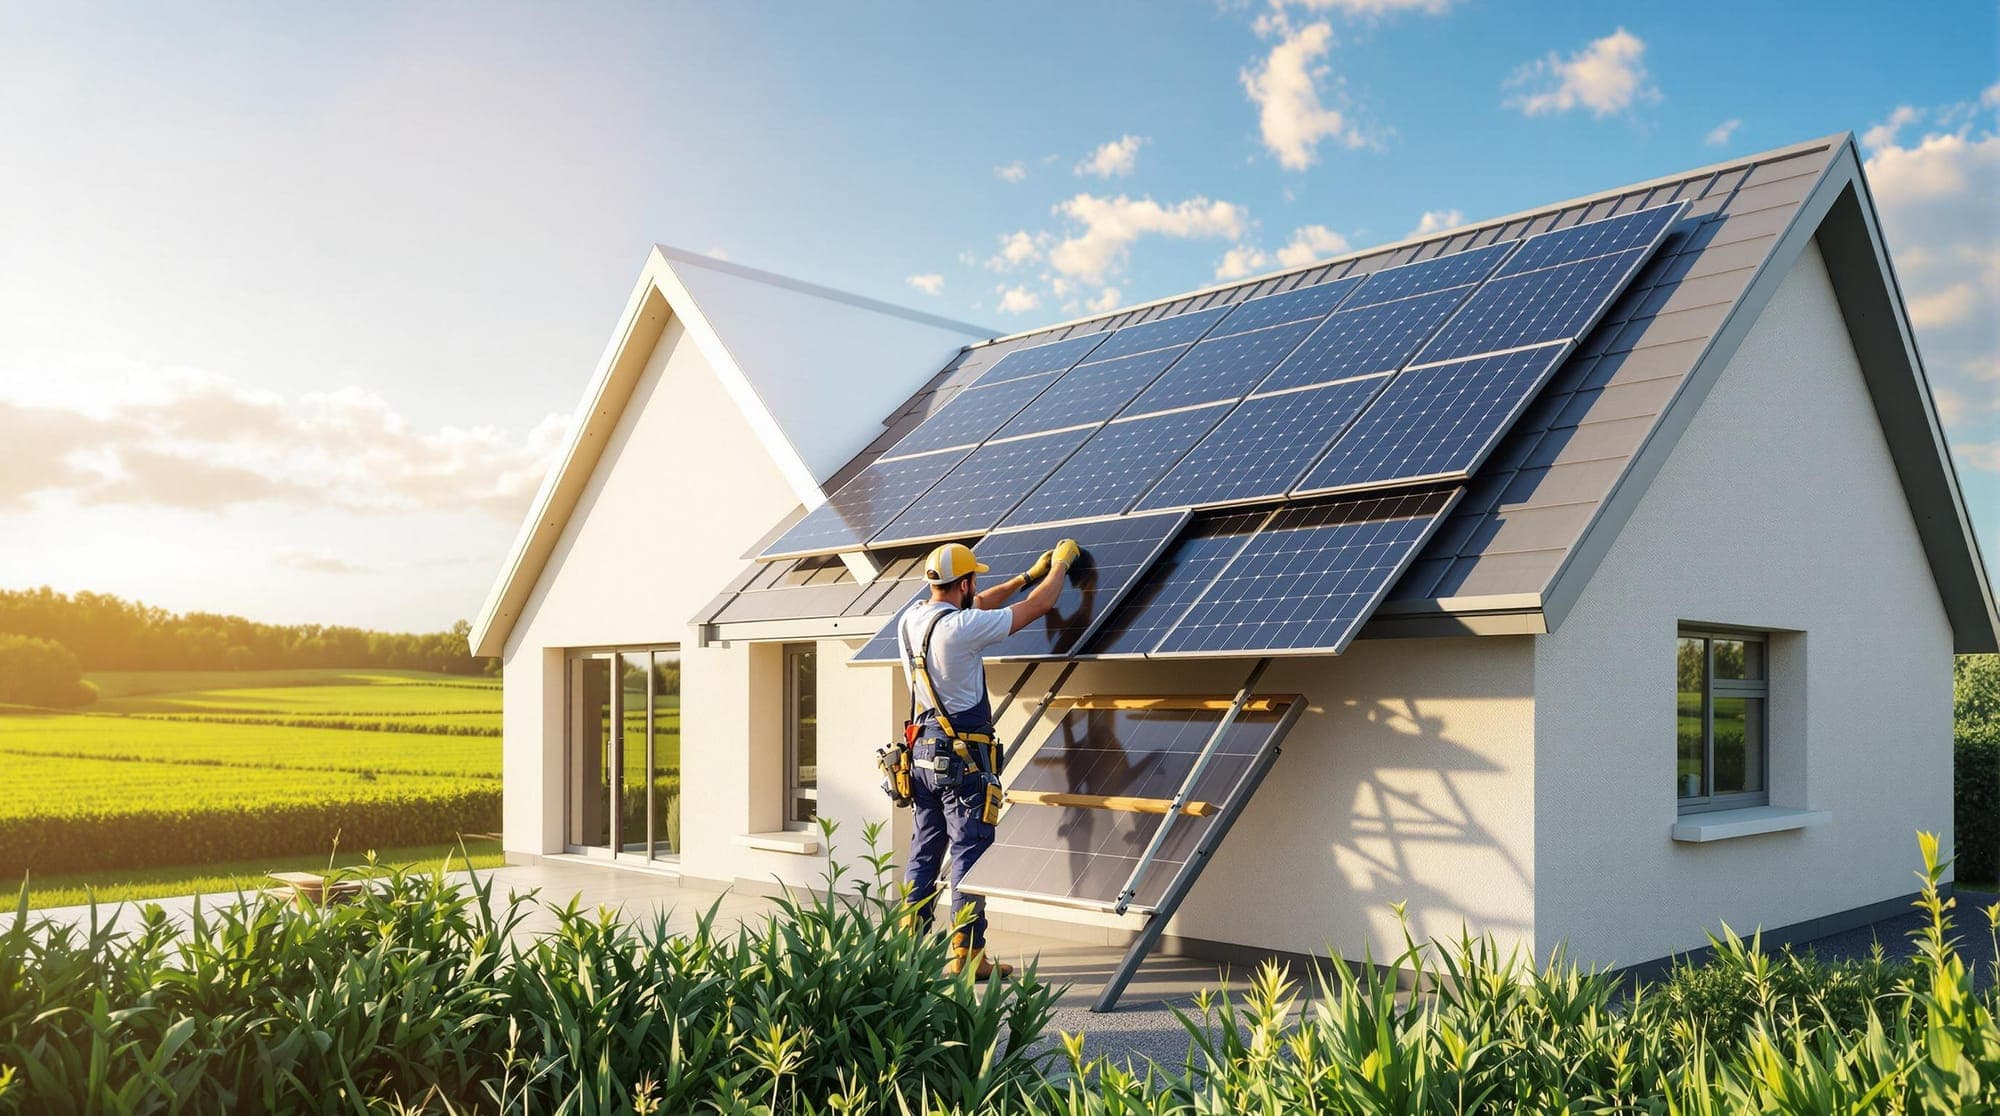
Solar Panel Installation: Step-by-Step Guide for Homeowners
Installing solar panels on your home in Ireland is a straightforward process that takes 6-10 weeks from your first enquiry to generating your own electricity. The actual installation takes just 1-2 days for a typical residential system. This guide walks you through every step — from getting your free quote to watching your first electricity bill plummet. See our choosing the right panel type for more details.
Whether you live in Dublin, Cork, Galway, or rural Donegal, the process is essentially the same. There are eight clear steps, and most homeowners tell us the hardest part was deciding to go ahead — everything after that was handled for them. This guide covers the full journey: site assessment, choosing your system, the SEAI grant, installation day, grid connection, and getting your grant paid. See our SEAI grant application guide for more details.
Solar Panel Installation in Ireland: The Complete Step-by-Step Process
The solar panel installation process in Ireland follows a predictable path. Every reputable installer follows the same sequence, and the SEAI grant process creates a natural structure. Here is the full process at a glance:
- Get a free quote and site assessment — an assessor visits your home to evaluate your roof, electricity usage, and system requirements
- Review your quote and choose your system — decide on system size, panel type, inverter, and whether to include battery storage
- Apply for the SEAI grant — your installer submits the application on your behalf (this must happen before any work begins)
- Schedule your installation date — once the grant is approved, you book a date that works for you
- Installation day — the crew arrives, installs everything in 1-2 days, and commissions your system
- ESB notification and grid connection — your installer notifies ESB Networks and arranges your smart meter if needed
- BER assessment and grant completion — a post-installation BER assessment is carried out and submitted to SEAI to release your grant
- Start generating and saving — monitor your system, register for the Clean Export Guarantee, and enjoy lower bills
The total timeline from first enquiry to generating electricity is typically 6-10 weeks. The actual installation takes just 1-2 days. The rest of the time is spent on grant approval, scheduling, and administrative steps that happen in the background. See our roof space requirements for more details.
Let us walk through each step in detail so you know exactly what to expect.
Step 1: Get a Free Solar Quote and Site Assessment
Everything starts with a simple enquiry. You fill in your details — name, address, Eircode, contact number, and a few basics about your home — and an experienced solar assessor gets in touch to arrange a visit. There is no cost, no obligation, and no pressure. The assessment is free because it benefits both sides: you get professional advice on whether solar makes sense for your home, and the installer gets to understand exactly what your property needs.
Ready to Get Started?
The first step is the easiest. Fill in your details here and we will arrange your free site assessment. We handle everything from the initial survey through to installation and grant completion — you just need to answer the door.
What Does the Assessor Check?
A proper site assessment is not a quick glance at your roof from the driveway. A qualified assessor evaluates several critical factors that determine what system your home needs and how much electricity it will generate:
- Roof condition and structure — solar panels last 25-30 years, so the roof beneath them needs to last at least as long. The assessor checks for cracked or missing tiles, damaged flashing, structural weakness, and roof type (slate, concrete tile, metal, and flat roofs all require different mounting systems)
- Roof orientation and pitch — south-facing roofs generate the most electricity, but east-west split systems are increasingly popular and practical. A pitch of 30-35 degrees is ideal for Ireland, but anything between 15-50 degrees works well
- Shading analysis — even partial shading from trees, chimneys, or neighbouring buildings can reduce output. The assessor identifies any issues and may recommend microinverters or power optimisers to mitigate shading losses
- Electrical panel — your consumer unit needs space for a new circuit breaker. Older homes sometimes need a panel upgrade, which adds a small cost
- Current electricity usage — ideally you will have a recent bill showing your annual kWh usage, which is crucial for sizing the system correctly
- BER rating — if your home already has a BER certificate, the assessor notes the current rating. The BER improvement from solar is one of the conditions for the SEAI grant
- Access and logistics — vehicle access for the installation van, space for scaffolding, and proximity to the electrical panel for cable runs
The entire assessment typically takes 30-60 minutes. Just be home, have a recent electricity bill handy if possible, and be ready to ask any questions. See our what solar panels cost in Ireland for more details.
What Happens After the Assessment?
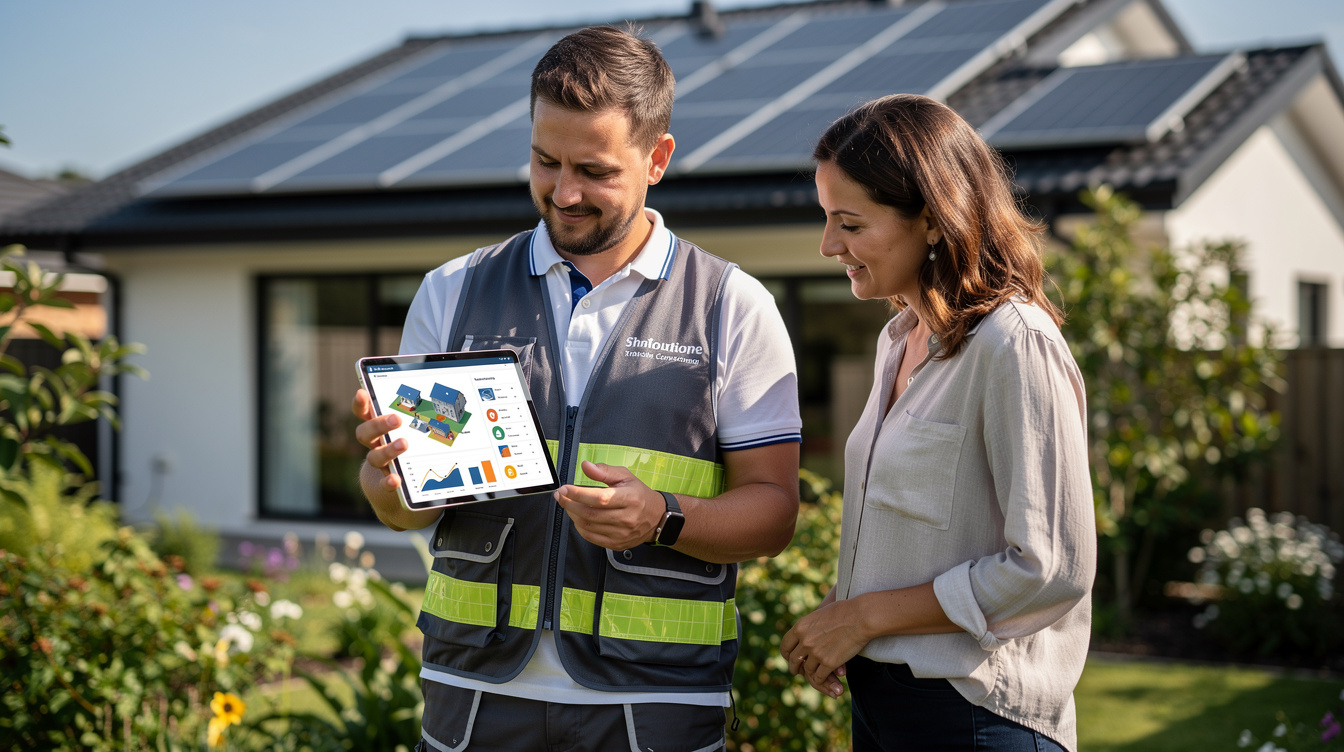
Within a few days of the site visit, you receive a detailed quote tailored to your home. This is not a generic estimate — it is based on the specific measurements, shading analysis, and energy usage data gathered during the assessment. The quote typically arrives by email with a full breakdown of costs, expected generation, estimated savings, and the SEAI grant amount you are eligible for.
Step 2: Review Your Quote and Choose Your System
Your quote is the most important document in the entire process. A good quote is transparent and detailed — if anything is vague or missing, ask for clarification before proceeding.
What Should a Good Solar Quote Include?
Every reputable solar quote in Ireland should include: system size in kW (typically 3-6 kW for a standard home); number and type of panels (brand, model, wattage — most installers use 400W-440W monocrystalline panels in 2026); inverter brand and model (string inverter, microinverters, or hybrid); battery details if included; mounting system specified for your roof type; total cost before grant (VAT is 0% on solar systems in Ireland until at least December 2026); SEAI grant amount; net cost after grant; estimated annual generation in kWh; estimated annual savings in euros; estimated payback period; and warranty details (panel warranty typically 25-30 years, inverter 10-15 years).
Choosing Your System Size
System sizing is where expertise matters most. The goal is to match the system to your actual electricity consumption so that you use as much of the generated electricity as possible, rather than exporting it to the grid for a much lower rate.
Here is a general guide to system sizing based on annual electricity consumption:
| Annual Consumption | Recommended System Size | Number of Panels | Approximate Cost (Before Grant) |
|---|---|---|---|
| 2,500 - 3,500 kWh | 3 kW | 7-8 panels | €4,500 - €5,500 |
| 3,500 - 5,000 kWh | 4 kW | 9-10 panels | €5,500 - €7,000 |
| 5,000 - 7,000 kWh | 5 kW | 12-13 panels | €6,500 - €8,000 |
| 7,000 - 10,000 kWh | 6 kW | 14-16 panels | €7,500 - €9,500 |
These are guideline figures — your actual quote will be based on the specifics of your home. If you are planning to buy an electric vehicle, install a heat pump, or make other changes that will increase your electricity consumption, mention this during the assessment so the system can be sized accordingly. See our planning permission guide for more details.
The Battery Decision
A battery stores excess solar electricity for use in the evening, increasing your self-consumption rate from a typical 30-40% to 60-80%. In 2026, a 5 kWh battery costs €2,500-€4,000 installed, while a 10 kWh battery costs €4,500-€7,000. The economics depend on your usage pattern — if you are out all day and use most electricity in the evening, a battery makes a big difference.
Many homeowners install panels first and add a battery later. If you think you might want one eventually, ask your installer to include a hybrid inverter — it costs only slightly more than a standard inverter and accommodates a future battery without needing to swap equipment.
Once you are happy with your quote, you confirm the order and the process moves to the grant application stage.
Step 3: Apply for the SEAI Grant
This is the step that catches people out. The SEAI solar panel grant must be approved before any installation work begins. If you install first and apply afterwards, you will not receive the grant. This is a hard rule with no exceptions. It is worth repeating: do not let any installer start work on your roof until you have your SEAI grant approval letter in hand.
Critical: SEAI Grant Must Be Approved First
The number one mistake homeowners make is allowing installation to begin before the SEAI grant is approved. The grant application must be submitted and approved before any work starts. Your installer should handle the application for you and will not schedule installation until approval is confirmed. If any installer suggests starting work before grant approval, that is a red flag.
How the SEAI Grant Application Works
The good news is that your installer handles the grant application for you in most cases. As an SEAI-registered installer, they have access to the online portal and know exactly what documentation is needed. Here is what happens:
- Your installer submits the application through the SEAI online system, including details of the proposed system, your property, and the quotation
- SEAI reviews the application — they check that the installer is registered, the system meets technical requirements, and the property is eligible
- You receive an approval letter — this comes by email and confirms the grant amount and the deadline by which installation must be completed (typically 8 months from approval)
- Installation can now proceed — only after you have this approval letter in hand
SEAI Grant Amounts for Solar Panels in 2026
The SEAI solar PV grant amounts for 2026 are:
| System Size | Grant Amount |
|---|---|
| Up to 2 kWp | €700 per kWp (max €1,800) |
| 2 kWp to 4 kWp | €300 per additional kWp |
| Maximum grant | €1,800 |
For most homeowners installing a 3-6 kW system, the grant is €1,800. This is deducted from the total cost after installation is complete and the post-installation BER is submitted. You pay the full amount to your installer upfront and SEAI reimburses the grant directly to you.
How Long Does Grant Approval Take?
In 2026, SEAI grant approval typically takes 4-8 weeks. During busy periods (spring and summer are the peak installation season in Ireland), it can stretch to 10 weeks. Your installer will track the application and let you know as soon as approval comes through.
While you wait for grant approval, you do not need to do anything. This is a good time to make any preparations at your end — clearing items from the attic space near where the inverter will be installed, trimming any overhanging trees that might shade the panels, or scheduling any roof repairs that the assessor identified.
Step 4: Schedule Your Installation Date
Once your SEAI grant is approved, it is time to book the installation. Your installer will contact you with available dates. The typical wait time from grant approval to installation is 2-6 weeks, depending on the installer's schedule and the time of year. Summer is the busiest season, so spring and autumn bookings tend to have shorter wait times.
What to Prepare Before Installation Day
Your installer will give you a specific checklist, but the essentials are: clear access where the scaffolding will go (move bins, garden furniture, cars); ensure the attic is accessible for cable routing; confirm the inverter location (garage, utility room, or cupboard near the electrical panel); give your neighbours a heads-up about the scaffolding and noise; make arrangements for pets; and plan for someone to be home at the start and end of the day. You do not need to take the full day off work — the crew works independently once they have access.
Step 5: Installation Day — What Happens
This is the exciting part — the day your home starts its journey towards energy independence. A typical residential solar installation (3-6 kW, 8-16 panels) is completed in a single day. Larger systems or those with complex roof configurations may take a second day. Here is what a typical installation day looks like hour by hour:
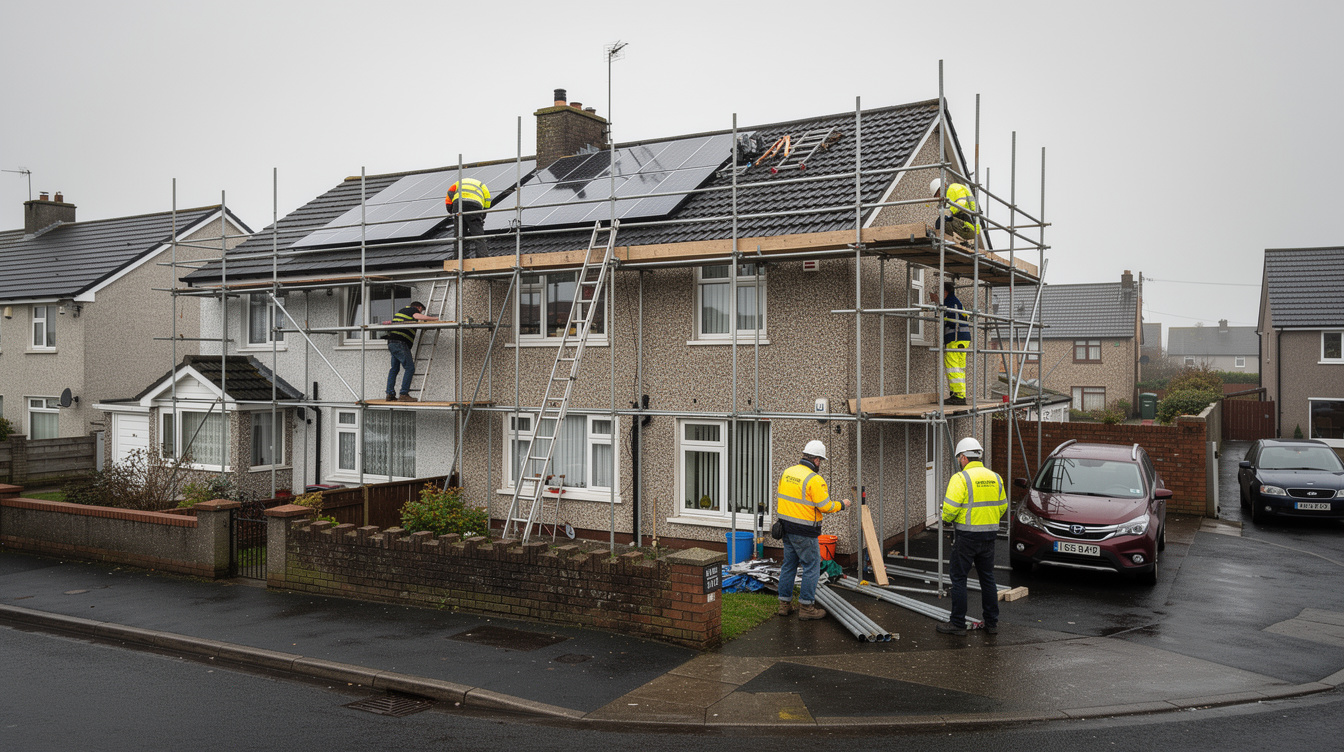
Early Morning (7:30 - 8:30 AM): Arrival and Setup
The installation crew arrives — typically 2-4 people depending on the system size. They unload equipment: panels, mounting rails, brackets, the inverter, cabling, tools, and safety equipment. They do a final visual check of the roof and confirm the layout plan with you. If scaffolding was not erected the day before (some installers send a scaffolding team the previous afternoon), it goes up first. Scaffolding erection takes 30-60 minutes for a standard semi-detached house.
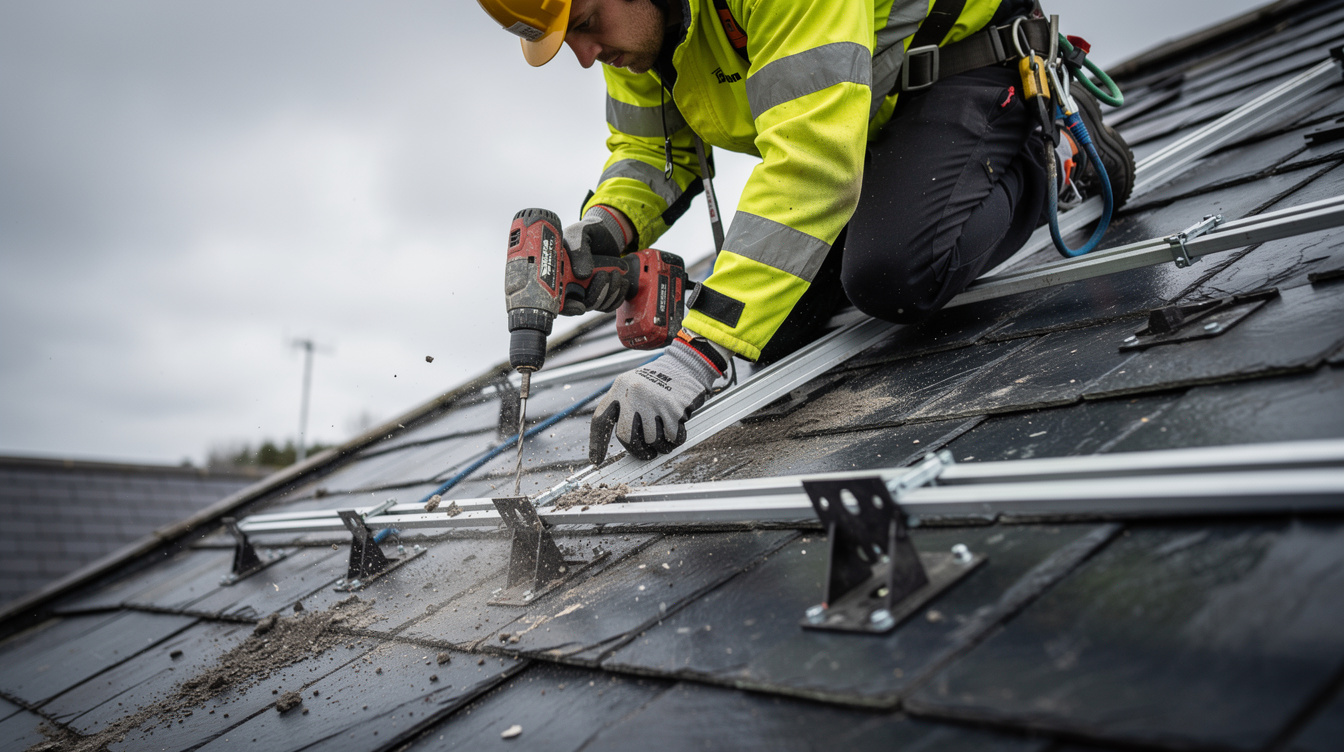
Mid-Morning (8:30 - 11:00 AM): Mounting System Installation
The crew installs the mounting system — aluminium rails attached to your roof rafters using specialised brackets. For a tile roof, individual tiles are lifted, brackets are screwed into the rafters beneath, and the tiles are replaced around the brackets. For slate roofs, the process uses hooks designed for slate. This is the noisiest part of the installation and the most critical from a weatherproofing perspective — experienced installers take their time to ensure every bracket is properly sealed and every tile sits flush.
Late Morning to Early Afternoon (11:00 AM - 1:30 PM): Panel Installation
With the rails in place, the panels go on. Each panel (about 20-22 kg) is lifted onto the roof, slid into position, and secured with clamps. An experienced crew can install 10-15 panels in under two hours. The panels are connected using weatherproof MC4 connectors, and DC cables are routed neatly along the rails and down through the roof into the attic space.
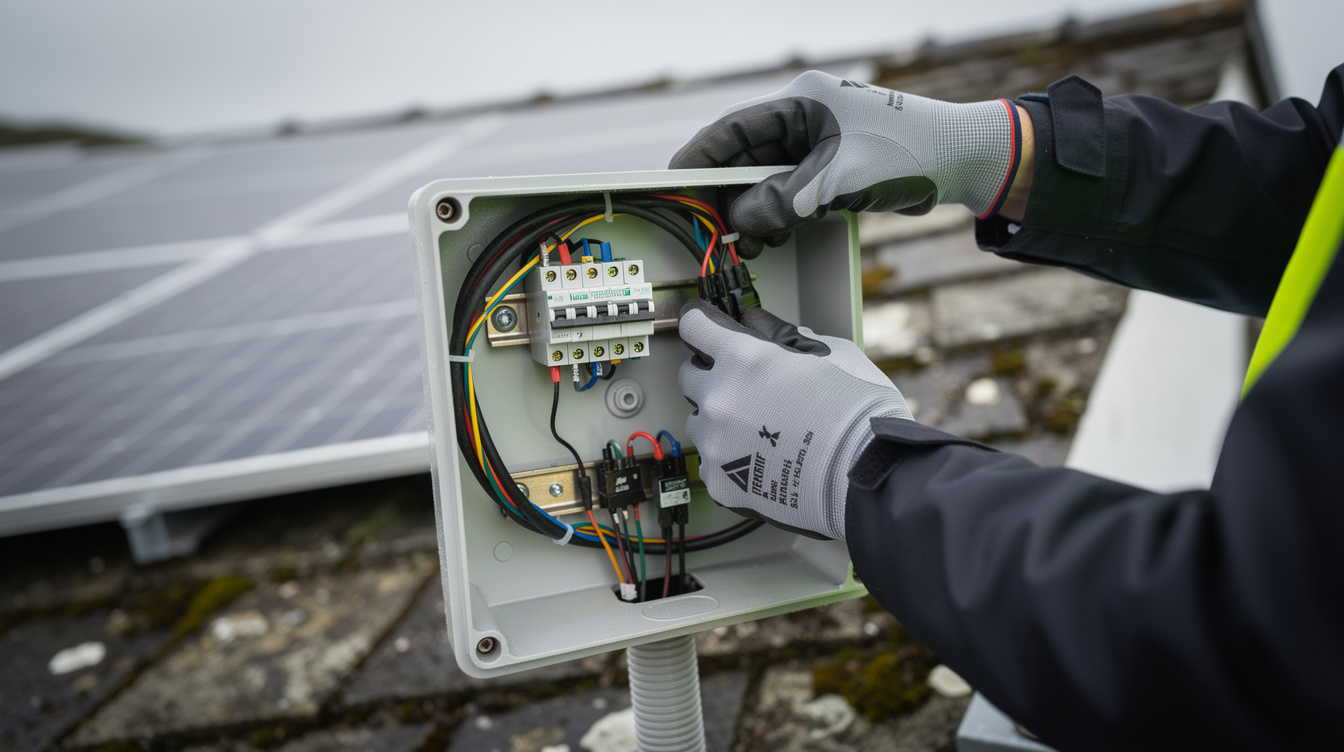
Early Afternoon (1:30 - 3:00 PM): Inverter and Electrical Work
While the roof team finishes, the electrician works inside the house. The inverter is mounted on the wall and connected to the DC cables from the panels, then wired into your home's electrical panel through a dedicated circuit breaker. If you are having a battery installed, it goes in at this stage too. The electrician also installs a generation meter to track your system's output.
Mid to Late Afternoon (3:00 - 4:30 PM): Testing and Commissioning
The inverter is switched on and the electrician verifies voltage levels, insulation resistance, earth bonding, and all safety systems. They configure the monitoring system — connecting it to your home WiFi so you can track generation and consumption through a smartphone app — and walk you through how everything works.
End of Day (4:30 - 5:00 PM): Handover
The crew cleans up, removes scaffolding (or this may happen the following day), and does a final walkthrough with you. You receive your documentation pack, which typically includes:
- Certificate of installation
- Electrical completion certificate
- Panel and inverter warranty documents
- System specifications and layout diagram
- Monitoring setup instructions
- Maintenance guidance
And that is it — your system is generating electricity. If the sun is shining during the installation, you will likely see it producing power the moment the inverter is switched on. Many homeowners find the first reading on the monitoring app genuinely exciting — watching kilowatts flow from your own roof into your home changes your relationship with electricity.
Step 6: ESB Notification and Grid Connection
Once your system is installed, ESB Networks needs to be notified. This is a regulatory requirement — they need to know about every generator connected to the grid, no matter how small. The good news is that your installer handles this for you.
The NC6 Form
Your installer submits an NC6 form to ESB Networks on your behalf — the standard notification for connecting a micro-generator (under 17.68 kW) to the grid. You do not need to fill it in yourself or contact ESB Networks directly. Your installer handles everything as part of their standard service.
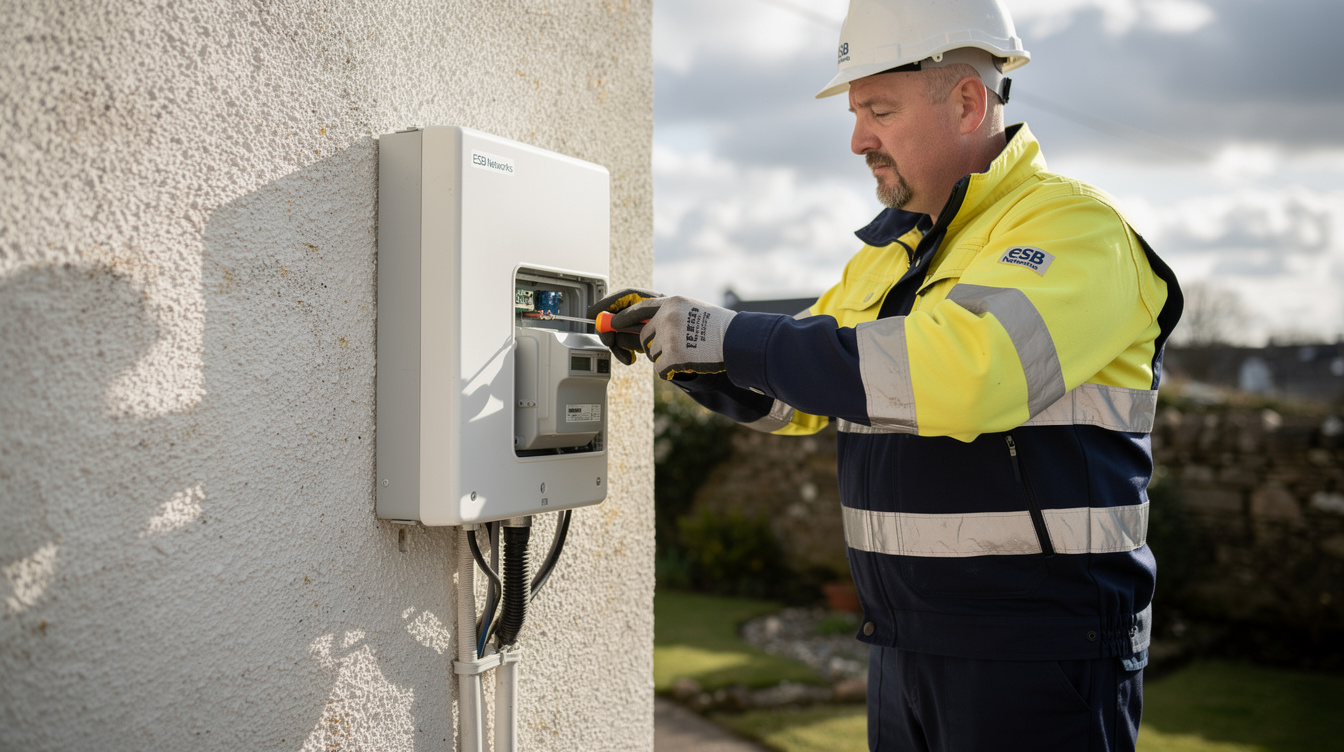
Smart Meter
To get paid for surplus electricity through the Clean Export Guarantee, you need a smart meter. If your home does not have one, ESB Networks will install one free of charge — they contact you directly to arrange access after the NC6 is processed. The meter swap takes about 30 minutes. In the meantime, your solar system works perfectly well, powering your home and reducing grid import — you simply cannot get paid for exports until the smart meter is in place.
What Your Installer Handles vs. What You Handle
| Task | Who Handles It |
|---|---|
| NC6 form submission | Your installer |
| Smart meter request | Automatic via NC6 process |
| Smart meter installation | ESB Networks (they contact you) |
| CEG registration with your supplier | You (once smart meter is installed) |
| Monitoring system setup | Your installer |
Step 7: BER Assessment and Grant Completion
After installation, you need a BER (Building Energy Rating) assessment to complete the SEAI grant process. This is a post-installation assessment that confirms the solar panels have been installed and shows the improvement in your home's energy rating. The BER assessment is a condition of the SEAI grant and must be completed before the grant payment is released.
What Happens During the BER Assessment
A registered BER assessor visits your home, inspects the solar installation, records the system specifications, and evaluates the overall energy performance. The assessment takes about an hour and results in an updated BER certificate. Most homes see a jump of one to two rating bands — a C2 might move to B3 or B2, depending on system size and existing insulation.
How Much Does the BER Assessment Cost?
A BER assessment in Ireland typically costs €150-€250. Some installers include this in their overall price; others charge it separately. Check your quote to see whether the BER assessment is included. Either way, the cost is far outweighed by the €1,800 grant you receive once the process is complete.
Submitting to SEAI for Grant Payment
Once the BER assessment is done and the updated BER certificate is published on the SEAI system, your installer submits the final documentation to SEAI to trigger the grant payment. This includes:
- Declaration of works completed
- Confirmation of the system installed matching the approved application
- The updated BER certificate reference number
- Invoice or proof of payment
SEAI processes the grant payment and transfers it directly to your bank account. This typically takes 4-6 weeks after all documentation is submitted. Make sure you have provided your bank details (IBAN) to SEAI when prompted — missing bank details is one of the most common reasons for delayed grant payments.
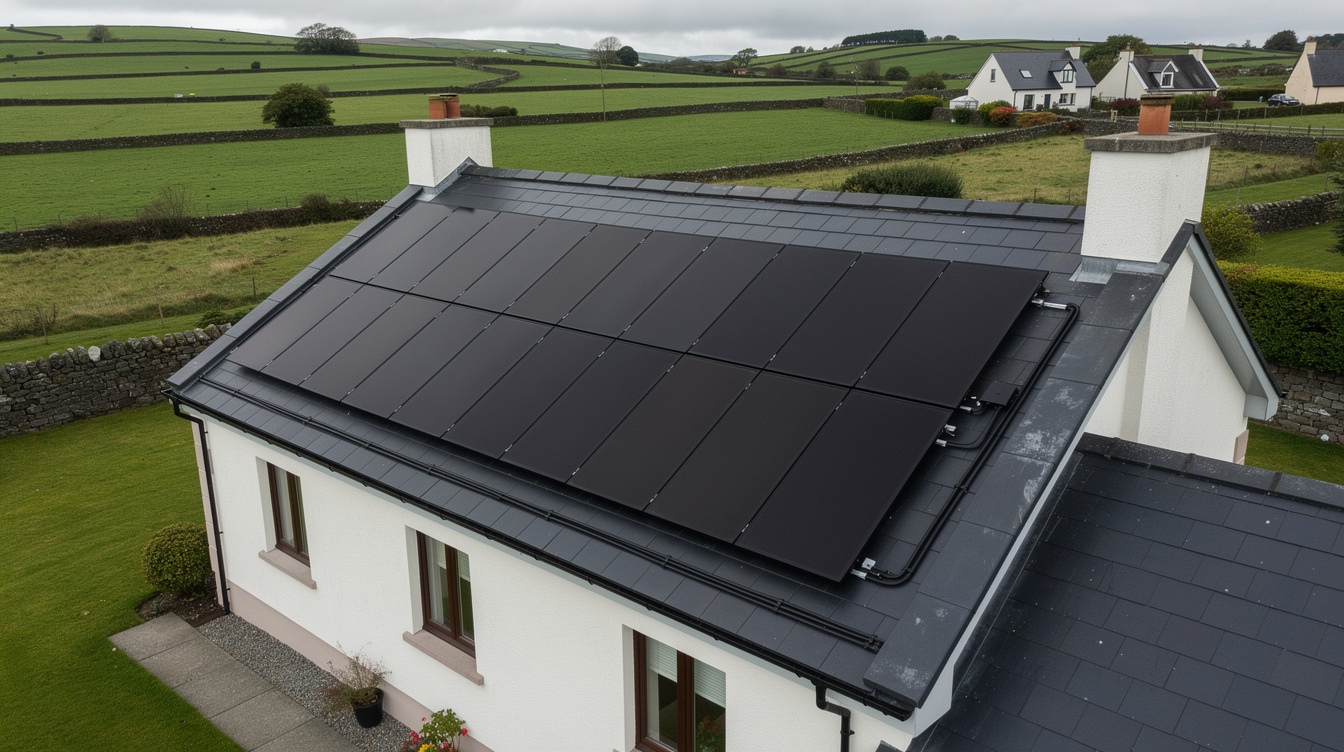
Step 8: Start Generating and Saving
Your system is installed, the paperwork is in motion, and your roof is now a power station. Here is what to focus on in the first weeks and months of solar ownership.
Monitoring Your System
Your inverter's monitoring app is your new best friend. Most modern inverters from brands like SolarEdge, Huawei, and GoodWe come with excellent smartphone apps that show you:
- Real-time generation — how many watts your panels are producing right now
- Daily, weekly, monthly, and annual generation — in kWh, so you can track performance over time
- Self-consumption rate — what percentage of your solar generation you use directly in the home
- Grid export — how much surplus electricity you send to the grid
- Grid import — how much electricity you still draw from the grid
- Battery status — if you have a battery, its charge level and charge/discharge activity
- Savings estimate — some apps calculate your estimated savings in euros
In the first few weeks, most homeowners check the app obsessively. This is completely normal and actually useful — you start to understand your generation patterns and learn when to run high-consumption appliances (dishwasher, washing machine, tumble dryer, EV charger) to maximise your use of free solar electricity.
Your First Electricity Bill
The moment of truth. Your first full electricity bill after solar installation is almost always a pleasant surprise. Most homeowners in Ireland see a reduction of 40-70% on their electricity bills, depending on system size, usage patterns, and the time of year.
Summer bills are the most dramatic — a well-sized system can reduce your summer electricity bill to almost nothing. Winter bills show a smaller reduction because generation is lower, but there is still a meaningful saving. Over a full year, the average Irish homeowner with a 4 kW system saves €800-€1,200 on electricity.
Register for the Clean Export Guarantee (CEG)
Once your smart meter is installed, register for the Clean Export Guarantee with your electricity supplier (Electric Ireland, Bord Gais, SSE Airtricity, Energia, etc.). The CEG pays you for surplus electricity exported to the grid — in 2026, rates typically range from 18-24 cent per kWh. You need your MPRN and installation details to sign up.
CEG income is typically €100-€300 per year — modest, but it provides a return on electricity you would otherwise generate for free and shortens your payback period.
Tax-Free Income
Income from the Clean Export Guarantee is tax-free for domestic microgeneration up to €200 per year. Any income above that threshold is subject to income tax. For most homeowners with a standard 3-6 kW system, total CEG income falls within or close to the tax-free limit.
How Long Does Solar Panel Installation Take?
One of the most common questions we hear is about timing. Here is a realistic timeline for the entire process from first enquiry to fully operational system:
| Phase | What Happens | Typical Duration | Running Total |
|---|---|---|---|
| Enquiry and site assessment | Fill in your details, assessor visits your home | 3-7 days | 1 week |
| Quote review and confirmation | Receive quote, review, confirm order | 3-10 days | 2 weeks |
| SEAI grant application | Installer submits, SEAI reviews and approves | 4-8 weeks | 6-10 weeks |
| Installation scheduling | Book a date once grant is approved | 2-6 weeks | 8-16 weeks |
| Installation day | Scaffolding, panels, inverter, wiring, testing | 1-2 days | 8-16 weeks |
| ESB notification | NC6 form submitted by installer | 1-5 days | 8-16 weeks |
| Smart meter (if needed) | ESB Networks installs smart meter | 2-8 weeks | 10-24 weeks |
| BER assessment | Post-install BER, uploaded to SEAI | 1-3 weeks | 11-27 weeks |
| Grant payment | SEAI processes and pays grant | 4-6 weeks | 15-33 weeks |
The key takeaway: your system is typically installed and generating electricity within 6-10 weeks of your first enquiry. The remaining steps happen in the background while your system is already saving you money. If you want your system installed before summer, the best time to enquire is January-March.
Start the Clock Today
The sooner you enquire, the sooner your system is installed and saving you money. Get your free quote now — the site assessment is free, there is no obligation, and it takes just 60 seconds to fill in your details.
What Can Go Wrong? Common Installation Issues
Solar panel installation is a mature, well-understood process in Ireland, and the vast majority of installations go smoothly. But issues can arise. Here are the most common problems and how to avoid them:
Roof Surprises
Occasionally, the crew discovers rotten rafters, asbestos in older roofs (pre-1990s homes), or non-standard roof construction that requires modified mounting solutions. These can add cost and delay.
How to avoid it: A thorough site assessment catches most of these issues. If your home is older (pre-1970s), mention any known roof history to the assessor. If you have concerns about asbestos, get a professional survey done beforehand (around €150-€300).
Weather Delays
Solar installations cannot happen in high winds, heavy rain, or icy conditions. Ireland's weather being what it is, there is always a risk that your scheduled installation day gets postponed. This is frustrating but unavoidable — working on a wet, windy roof is dangerous, and no responsible installer will put their crew at risk.
How to avoid it: You cannot control the weather, but you can reduce the impact by being flexible with dates. If your installation is postponed, most installers reschedule within a few days. Booking during the more settled months (April-September) reduces the risk of weather delays, but they can happen any time of year.
Wrong System Size
An undersized system does not generate enough to make a meaningful dent in your bills. An oversized system generates more than you can use, and while you get paid for exports through the CEG, the export rate is much lower than the import rate — meaning you are paying for capacity that delivers a poor return.
How to avoid it: This comes down to the quality of the initial assessment and quote. A good assessor will size the system based on your actual electricity consumption, not just your roof space. Provide accurate electricity usage data (12 months of bills is ideal) and be honest about any planned changes to your energy use (EV, heat pump, home office, etc.).
Missed SEAI Grant Deadline
Once approved, you have a set period (typically 8 months) to complete the installation and submit final documentation. If you miss this deadline, the approval expires and you need to reapply.
How to avoid it: Work with an installer who manages the entire process and tracks grant deadlines. If unexpected delays arise, your installer should contact SEAI to request a deadline extension before it expires.
Poor Workmanship or Communication
Common workmanship issues include poorly sealed roof penetrations that lead to leaks, untidy cable routing, inadequate panel fixing (leading to rattling in wind), and incorrect inverter configuration. The most common complaint overall is not about work quality but poor communication — not knowing when the grant was submitted, when approval came through, or who to contact with questions.
How to avoid it: Choose an SEAI-registered installer with a solid track record and verifiable customer reviews. Ask to see examples of previous installations. Before committing, ask about their communication process — who is your point of contact and how will you be kept informed at each stage? A company that communicates well during the sales process will usually communicate well throughout the project.
Frequently Asked Questions
How long does it take to install solar panels on a house?
The physical installation takes 1-2 days for a typical residential system of 3-6 kW (8-16 panels). This includes scaffolding, mounting rails, panel installation, inverter and wiring, and testing. Larger systems (over 6 kW) or complex installations with multiple roof faces may take an additional day. The entire process from first enquiry to generating electricity takes 6-10 weeks, with the SEAI grant approval period (4-8 weeks) being the longest wait.
Do I need to be home during installation?
Someone needs to be present at the start of the day (to provide access and confirm the plan) and at the end (for the walkthrough and handover). You do not need to be there for the entire installation. The crew works independently and will not need to enter most rooms of your home. If you work from home, you can continue working — the main disruption is noise during the morning when mounting brackets are being drilled into rafters. If you have a partner, family member, or trusted neighbour who can be present, that works fine.
Will my electricity be off during installation?
There will be a brief interruption (typically 30-60 minutes) when the electrician connects the solar system to your electrical panel. They need to switch off the main supply to safely install the new circuit breaker. The crew will warn you before this happens so you can save any work on computers and avoid opening the fridge or freezer. Apart from this brief outage, your electricity supply remains normal throughout the installation.
How long before I see savings on my electricity bill?
Immediately. Your system starts generating electricity the moment the inverter is switched on. You will see reduced electricity import from the grid from day one. However, the savings will not appear on your electricity bill until your next billing cycle. Most electricity suppliers bill bi-monthly, so your first reduced bill arrives within 1-2 months of installation. The biggest savings are on summer bills when generation is highest and electricity consumption for heating is lowest.
Do solar panels work in Irish weather?
Yes. Solar panels generate electricity from daylight, not direct sunshine. A 4 kW system in Ireland generates approximately 3,400-4,000 kWh per year. Even on overcast days, panels generate 10-25% of their peak capacity. Ireland's moderate temperatures actually benefit solar panels, as they perform less efficiently in extreme heat.
What happens if I sell my house after installing solar panels?
Solar panels add value to your home. Studies consistently show that homes with solar panels sell for more than comparable homes without them. The improved BER rating (which is legally required on property advertisements) is a concrete selling point. The system simply transfers to the new owner along with the property. Warranties remain valid — they are tied to the installation, not the original homeowner. You do not need to repay the SEAI grant if you sell your home.
Can I install solar panels on a flat roof?
Yes. Flat roof installations use angled mounting frames that tilt the panels to the optimal angle (typically 30-35 degrees in Ireland). These frames are usually ballasted (weighted down) rather than fixed through the roof membrane, which avoids creating waterproofing issues. Flat roof installations cost slightly more than standard pitched roof installations due to the additional mounting hardware, but they have the advantage of allowing optimal orientation regardless of which direction your building faces.
Do I need planning permission for solar panels in Ireland?
For most residential installations, no. Solar panels are classified as exempt development under planning regulations, provided they do not project more than 150mm above the roof surface, do not extend above the ridge line, and the total panel area does not exceed 50 square metres per house. Listed buildings and homes in architectural conservation areas may need planning permission — check with your local authority if this applies.
What maintenance do solar panels need?
Very little. Solar panels have no moving parts and in Ireland, rain keeps them clean. The main maintenance is checking the monitoring app occasionally to ensure generation is normal, a visual inspection once or twice a year, and keeping nearby trees trimmed. Inverters may need replacement once during the system's lifetime (typically after 10-15 years), but most come with warranties that cover this period.
How many solar panels can I fit on my roof?
A standard 400W panel measures approximately 1.7m x 1.1m. A typical semi-detached house has 20-30 square metres of usable south-facing roof area, accommodating 10-15 panels (4-6 kW). East-west split installations use both sides of the roof and can significantly increase capacity. Your assessor calculates the exact number based on your roof dimensions, accounting for chimneys, dormer windows, vents, and required edge setbacks.
What is the payback period for solar panels in Ireland?
The typical payback period for a residential solar system in Ireland in 2026 is 5-8 years, depending on system size, electricity prices, self-consumption rate, and whether you have a battery. After the SEAI grant, a 4 kW system costs approximately €4,500-€5,500 and generates savings of approximately €800-€1,200 per year. This gives a payback period of roughly 4-7 years. After payback, your system generates essentially free electricity for the remaining 18-25+ years of its lifespan.
Can I add more panels later?
Yes, though your inverter needs sufficient capacity for additional panels and the mounting rails may need extending. It is generally more cost-effective to install the right-sized system from the start, but expansion is possible if your energy needs grow — for example, if you buy an electric vehicle or install a heat pump.
Is battery storage worth it?
It depends on your usage pattern. If you are at home during the day and use a significant amount of electricity while the sun is shining, a battery provides less additional benefit because you are already using your solar electricity directly. If you are out at work during the day and use most of your electricity in the evening, a battery captures daytime surplus for evening use and can increase your self-consumption from around 30-40% to 60-80%. In 2026, battery payback periods are typically 8-12 years on their own, but they add resilience (some batteries provide backup power during grid outages) and future-proof your system against electricity price increases.
What happens during a power cut if I have solar panels?
Standard grid-connected systems without a battery shut down during a power cut — this is a safety requirement to protect engineers working on the lines. If you have a battery with backup capability, some hybrid inverters can keep a limited set of circuits running using solar and battery power. If backup power is important to you, discuss this with your installer during the assessment — not all batteries and inverters support this feature.
Ready to Start Your Solar Journey?
You have read the guide — now take the first step. Getting a free solar assessment for your home takes 60 seconds and sets the entire process in motion. Our team handles everything: the site assessment, system design, SEAI grant application, installation, ESB notification, and BER assessment. All you need to do is fill in your details.
Related Articles

Lidl Plug-In Solar Panels: Are They Coming to Ireland? What You Need to Know (2026)
Lidl will sell plug-in solar panels for €200-€500 that save €100-€200/year. But a full installation saves €700-€950/year after the €1,800 SEAI grant. Full comparison inside.

Can You Sell Electricity Back to the Grid in Ireland? (Clean Export Guarantee Guide 2026)
Irish homeowners can sell surplus solar electricity back to the grid at €0.155-€0.185/kWh through the Clean Export Guarantee (CEG). Earn €300-€450/year tax-free. Full guide: rates by supplier, how to set up, and how to maximise earnings.

How to Choose Solar Security Lights for Your Home
Match brightness, motion sensors, battery life, and weather resistance to choose durable, energy-saving solar security lights for reliable home protection.