Heat Pump Installation Ireland: What Actually Happens (2026 Guide)
A step-by-step look at the full installation process — from preparation to commissioning — so you know exactly what to expect.
\n\nYou have done the research. You know a heat pump will slash your heating bills and boost your BER rating. But there is a question most homeowners ask before committing: what does the installation actually involve?
\n\nThis is not the general overview. This article is specifically about the installation process for heat pumps in Ireland in 2026 — what happens before, during, and after the work. We will cover timelines, costs, radiator upgrades, pipework, the SEAI grant process, common mistakes, and how to choose the right installer. If you want the broader picture of heat pump types and running costs, see our complete air-to-water heat pump guide.
\n\nLet us walk through it from start to finish.
\n\nBefore a Single Pipe Is Touched: Preparing Your Home
\n\nA heat pump installation does not start on the day the engineers arrive. There is preparation work — some of it done by your installer, and some by you.
\n\nThe Home Energy Assessment
\n\nEvery SEAI-funded heat pump installation begins with a Home Energy Assessment. Your installer (or a BER assessor working with them) will visit your home to evaluate:
\n\n- \n
- Heat Loss Indicator (HLI): This must be 2.3 or below to qualify for the SEAI grant. If your home is poorly insulated, you may need to upgrade insulation first. \n
- Existing heating system: What boiler you have, the age and condition of radiators, pipework diameter, and hot water cylinder type. \n
- Electrical supply: Whether your consumer unit (fuse board) can handle the additional load and if a dedicated circuit is needed. \n
- Outdoor unit location: Where the heat pump unit will sit — clearance requirements, noise considerations, and planning permission implications (most domestic installations are exempt). \n
This assessment typically takes 1–2 hours. The installer will then produce a detailed quote and system design. Do not accept a quote from any company that has not visited your home in person.
\n\nWhat You Need to Do Before Installation Day
\n\n- \n
- Clear the area where the outdoor unit will be placed — at least 1.5 metres of clear space around the proposed location. \n
- Ensure the installer has easy access to your hot press (airing cupboard) and utility areas. \n
- If you are replacing radiators, decide on finishes and sizes in advance so there are no delays. \n
- Arrange alternative heating if the installation spans multiple days in winter. A portable electric heater is usually sufficient. \n
- Confirm your SEAI grant application has been approved before work begins. \n
The Installation Process: Day by Day
\n\nA typical air-to-water heat pump installation in an existing Irish home takes 2 to 5 days, depending on the complexity. Here is what a standard 3-day installation looks like:
\n\nDay 1: Out With the Old
\n\nThe first day is primarily about removal and preparation:
\n\n- \n
- Drain the existing heating system. The old boiler is isolated, and the central heating system is drained down. This takes 1–2 hours depending on the size of the system. \n
- Remove the old boiler. The oil or gas boiler is disconnected and removed. If you had an oil boiler, the installer may also disconnect the oil line (decommissioning the oil tank is a separate job). \n
- Prepare the base for the outdoor unit. This usually means laying a concrete pad or mounting anti-vibration feet on an existing hard surface. The base must be level and sturdy enough to support 80–120 kg. \n
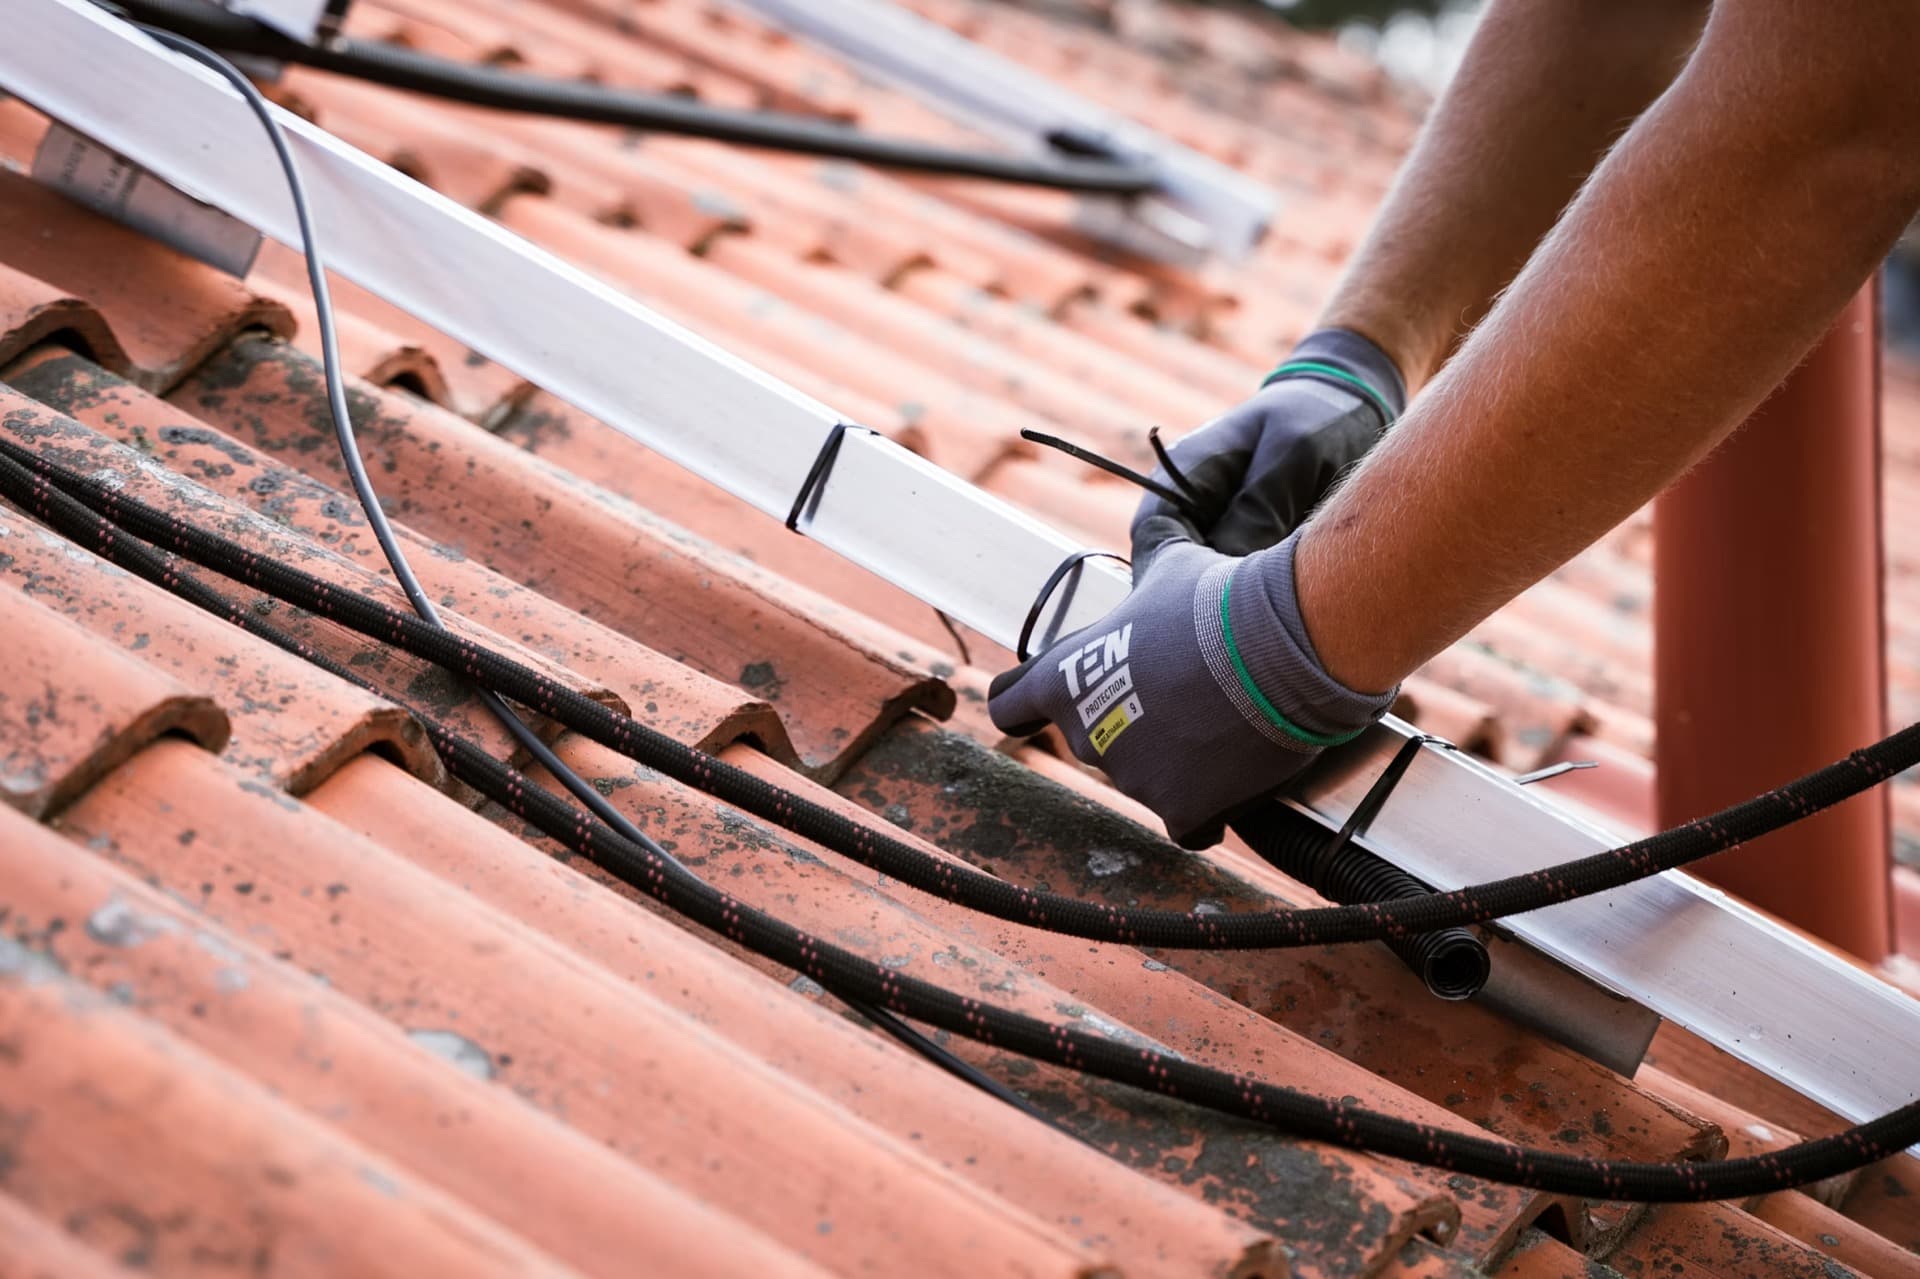
- Begin pipework modifications. If the existing pipework is being reused, the installer will start connecting the new flow and return pipes. If the pipe diameter needs upgrading (common in older homes), this work begins on day one. \n
At the end of day one, you will typically have no heating or hot water. This is the most disruptive part of the process.
\n\nDay 2: The Heat Pump Goes In
\n\n- \n
- Install the outdoor unit. The heat pump is positioned on its base and secured. Refrigerant lines are run from the outdoor unit to the indoor hydraulic module (if it is a split system) or directly to the heating circuit (monobloc system). \n
- Install the hot water cylinder. The old copper cylinder is removed and replaced with a heat-pump-compatible unvented cylinder (typically 200–300 litres). This is a bigger job than most homeowners expect — unvented cylinders require specific safety valves, expansion vessels, and discharge pipes. \n
- Complete internal pipework. The installer connects the heat pump to the heating circuit, including any buffer tank or low-loss header if required. \n
- Electrical work. A qualified electrician installs the dedicated circuit from your fuse board to the heat pump. This includes an isolator switch near the outdoor unit and, in some cases, an upgrade to the main fuse or consumer unit. \n
By the end of day two, the system is physically connected but not yet operational.
\n\nDay 3: Commissioning and Handover
\n\n- \n
- Fill and pressurise the heating system. The system is filled with water, pressurised, and checked for leaks. \n
- Flush the system. A powerflush removes any debris, sludge, or contaminants from the pipework. This is essential — dirty water is the number one cause of early heat pump problems. \n
- Commission the heat pump. The installer powers up the unit, checks refrigerant pressures (on split systems), and runs through the startup sequence. \n
- Set up weather compensation. This is critical and often done badly. The heat pump’s controller is linked to an outdoor temperature sensor, and the heating curve is configured so the system adjusts its flow temperature based on outside conditions. A properly set heating curve is the difference between an efficient system and an expensive one. \n
- Homeowner handover. The installer walks you through the controls, explains how to set timers and temperatures, and answers your questions. You should receive a commissioning certificate and all warranty documentation. \n
Days 4–5 (If Needed)
\n\nInstallations that take 4 or 5 days typically involve:
\n\n- \n
- Full radiator replacement throughout the house \n
- Significant pipework upgrades (e.g., converting from micro-bore to 22mm pipe) \n
- Underfloor heating installation in one or more rooms \n
- Complex electrical upgrades \n
Radiator Upgrades: When You Need Them and What They Cost
\n\nThis is one of the most common questions — and one of the most misunderstood aspects of heat pump installation.
\n\nHeat pumps operate most efficiently at lower flow temperatures than oil or gas boilers. A typical boiler runs at 60–75°C. A heat pump runs best at 35–45°C. At these lower temperatures, your existing radiators may not emit enough heat to keep your rooms warm — unless they are oversized for the room.
\n\nDo You Definitely Need New Radiators?
\n\nNot always. Your installer should calculate the heat loss for each room and compare it to the output of your existing radiators at the proposed flow temperature. In many Irish homes built after 2000, the existing radiators are large enough. In older homes, especially those with single-panel radiators, upgrades are common.
\n\n| Scenario | \nRadiator Upgrade Likely? | \nTypical Cost | \n
|---|---|---|
| Home built after 2005, double-panel radiators | \nUnlikely – existing radiators often sufficient | \n€0 | \n
| Home built 1980–2005, mixed radiators | \nSome rooms may need larger radiators | \n€1,500 – €3,000 | \n
| Home built before 1980, single-panel radiators | \nMost or all radiators will need replacing | \n€3,000 – €5,500 | \n
| Underfloor heating throughout (new build or renovation) | \nNo radiators needed | \n€0 (UFH cost separate) | \n
Remember, the SEAI grant includes up to €2,000 towards central heating system upgrades, which covers radiator replacements.
\n\nHot Water Cylinder Replacement
\n\nYour old copper hot water cylinder almost certainly needs to go. Heat pumps require a larger, better-insulated cylinder — typically an unvented stainless steel model with a coil specifically sized for heat pump flow temperatures.
\n\nKey specifications for a heat-pump-compatible cylinder:
\n\n- \n
- Capacity: 200 litres minimum for a 3-bed home; 250–300 litres for 4+ bedrooms or homes with multiple bathrooms. \n
- Coil size: A large internal coil (3–4 square metres of surface area) to allow efficient heat transfer at low flow temperatures. \n
- Insulation: High-density foam insulation to minimise standing heat losses. \n
- Unvented system: Most heat pump installations use unvented (pressurised) cylinders, which give better shower pressure and eliminate the need for a header tank in the attic. \n
A quality heat-pump-compatible cylinder costs €1,200 – €2,000 including installation. This is included in most heat pump installation packages.
\n\nUnderfloor Heating vs Radiators With Heat Pumps
\n\nUnderfloor heating (UFH) is the ideal partner for a heat pump because it operates at very low flow temperatures (30–40°C), which is exactly where heat pumps are most efficient. But retrofitting UFH into an existing home is expensive and disruptive.
\n\n| Factor | \nUnderfloor Heating | \nRadiators | \n
|---|---|---|
| Efficiency with heat pump | \nExcellent – low flow temps | \nGood – if correctly sized | \n
| Retrofit difficulty | \nHigh – floors must be lifted | \nLow – swap like for like | \n
| Retrofit cost per room | \n€1,500 – €3,000 | \n€300 – €600 | \n
| Response time | \nSlow – hours to heat up | \nFaster – 20–40 minutes | \n
| Comfort | \nEven, consistent warmth | \nWarmer near radiators, cooler elsewhere | \n
| Best for | \nNew builds, major renovations | \nRetrofit installations | \n
The practical recommendation for most Irish retrofits: keep your radiators, upgrade where needed, and consider UFH only in ground-floor extensions or during major renovation work. A mixed system (UFH downstairs, radiators upstairs) works well and is increasingly common.
\n\nPipework and Electrical Requirements
\n\nPipework
\n\nOlder Irish homes often have micro-bore pipework (8mm or 10mm) running from a manifold to individual radiators. This restricts water flow and is not ideal for heat pumps, which need good flow rates to operate efficiently.
\n\nYour installer will assess whether your pipework is adequate. Common upgrades include:
\n\n- \n
- Replacing micro-bore runs with 15mm or 22mm copper pipe \n
- Upgrading the main flow and return pipes to 28mm where needed \n
- Adding isolation valves and drain points for future maintenance \n
- Installing a system filter (such as a MagnaClean) to protect the heat pump from debris \n
Pipework upgrades add €500 – €2,000 to the installation cost, depending on the extent of the work.
\n\nElectrical Requirements
\n\nA domestic air-to-water heat pump typically draws 2–5 kW of electrical power. This requires:
\n\n- \n
- A dedicated circuit from your consumer unit (fuse board) to the heat pump, protected by an appropriately rated MCB. \n
- An isolator switch within 1 metre of the outdoor unit. \n
- A suitable earth connection to the outdoor unit. \n
- Potentially, an upgrade to your main fuse if your existing supply is limited (common in rural homes with older ESB connections). \n
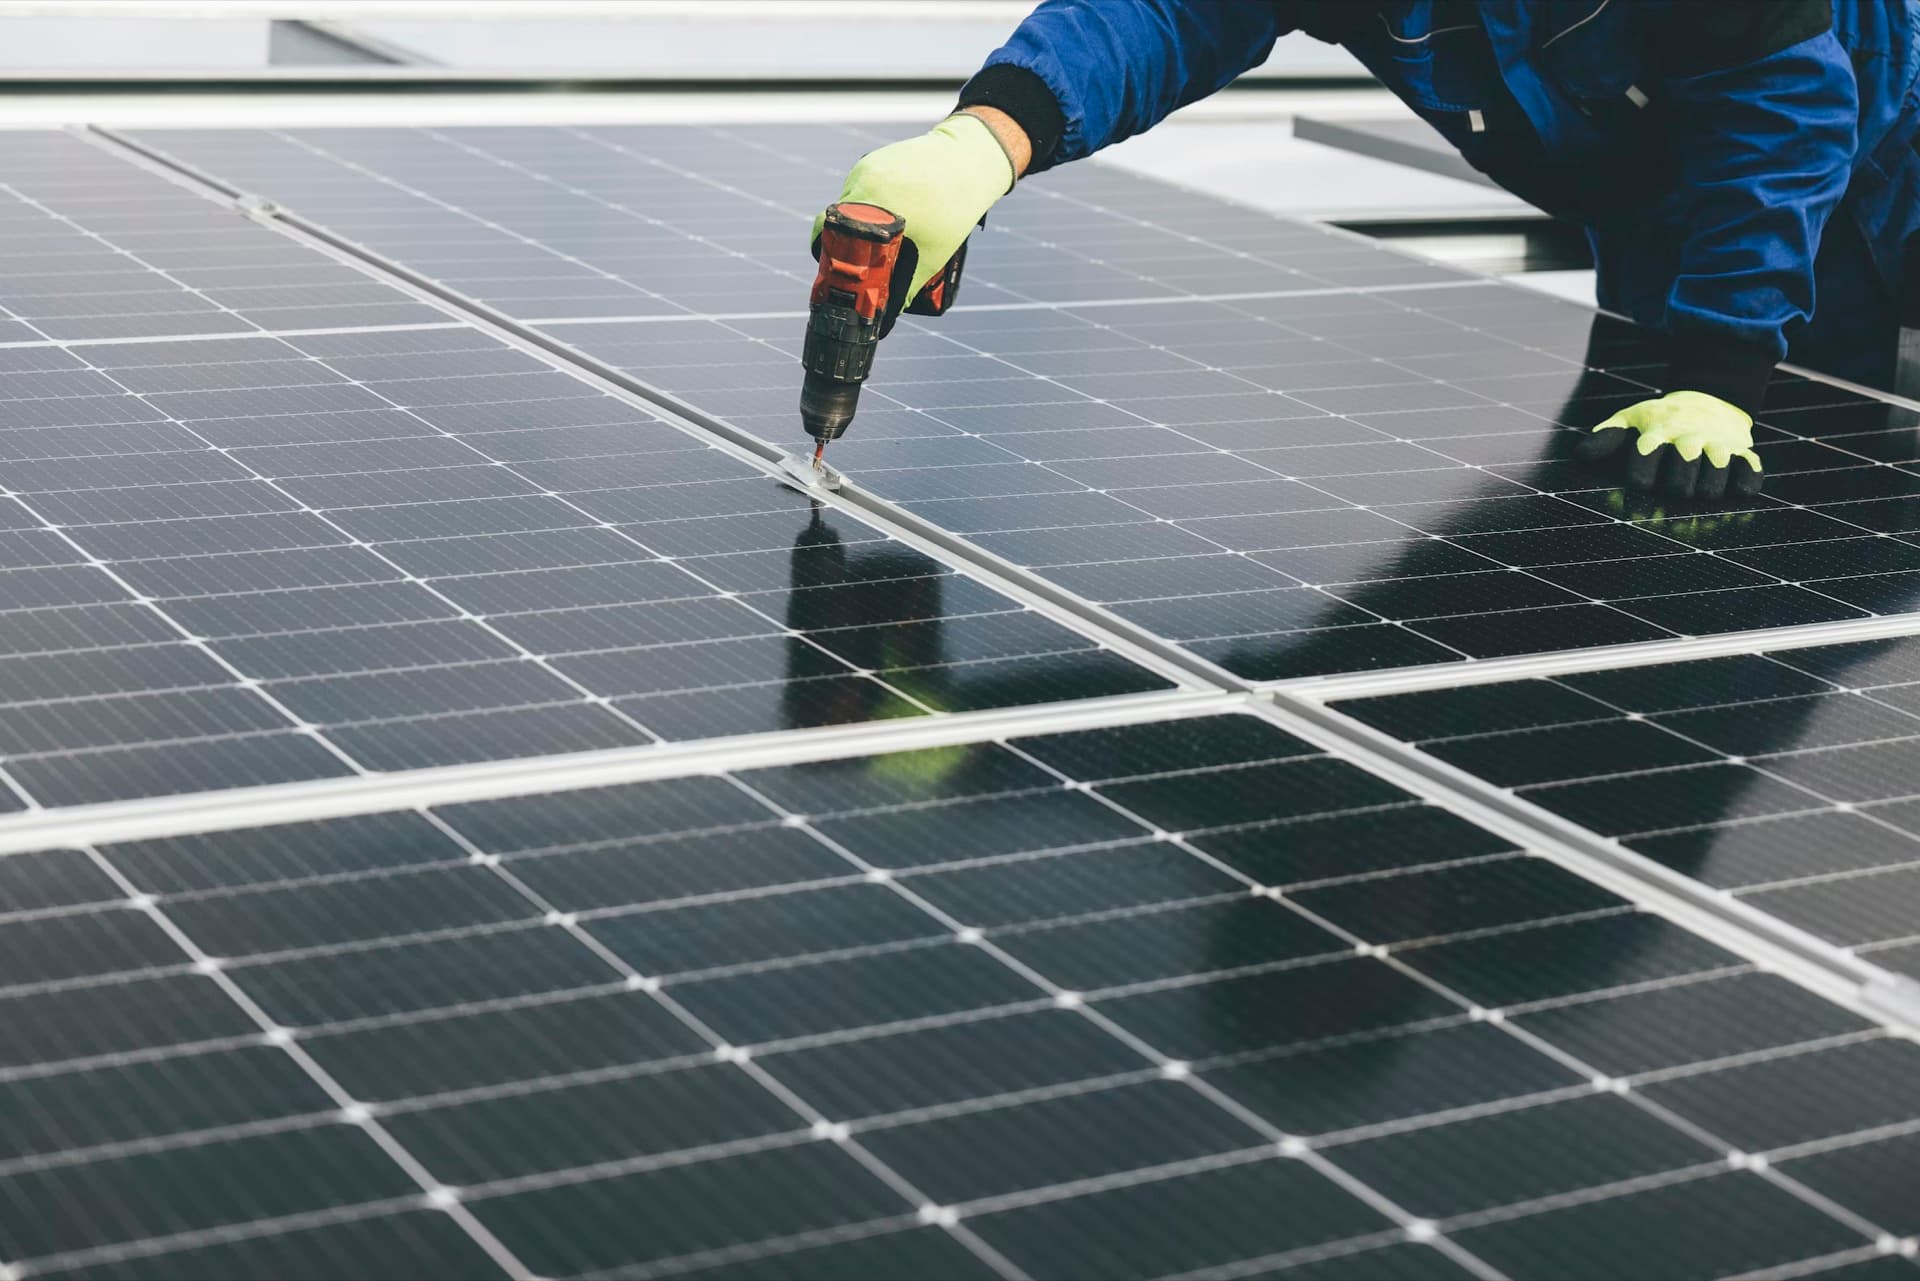
If you have solar panels or are considering them, your electrician should plan the consumer unit layout to accommodate both systems. This is a good time to explore how solar panels can offset your heat pump’s electricity consumption.
\n\nGet a Free Heat Pump Installation Quote
\nWe connect you with SEAI-registered installers in your area. No obligation, no pressure.
\n\nCommissioning and Weather Compensation: The Most Important Step
\n\nCommissioning is where a good installer separates themselves from a mediocre one. A poorly commissioned heat pump will cost you hundreds of euro per year in wasted electricity.
\n\nWhat Is Weather Compensation?
\n\nWeather compensation is a control strategy where the heat pump adjusts its flow temperature based on the outdoor air temperature. When it is 12°C outside, your home needs much less heat than when it is −2°C. A weather-compensated system delivers exactly the right amount of heat at all times, rather than blasting hot water through the radiators regardless of conditions.
\n\nThis is controlled by a heating curve — a graph that maps outdoor temperature to flow temperature. Setting this curve correctly is essential:
\n\n- \n
- Too steep: The system overheats the home, wastes electricity, and cycles on and off frequently. \n
- Too flat: The home does not reach a comfortable temperature on cold days. \n
- Just right: The heat pump runs for long periods at low output, maintaining a steady indoor temperature with minimal energy use. \n
A competent installer will set an initial heating curve based on their assessment and then return after 2–4 weeks to fine-tune it based on your feedback. If your installer does not mention weather compensation, find a different installer.
\n\nOther Commissioning Checks
\n\n- \n
- System pressure test (typically 1.0–1.5 bar when cold) \n
- Flow rate measurement through the heat pump \n
- Refrigerant charge verification (split systems) \n
- Legionella cycle setup for the hot water cylinder (periodic heating to 60°C) \n
- Timer and zone programming \n
- Wi-Fi or smart control setup if applicable \n
How Long Does Heat Pump Installation Take?
\n\n| Installation Type | \nTypical Duration | \nNotes | \n
|---|---|---|
| Simple swap (modern home, no radiator changes) | \n2 days | \nBoiler out, heat pump in, minimal pipework | \n
| Standard retrofit (some radiator upgrades) | \n3 days | \nMost common scenario in Ireland | \n
| Full system overhaul (all radiators, pipework upgrades) | \n4–5 days | \nOlder homes, pre-1980 builds | \n
| Heat pump plus underfloor heating | \n5+ days | \nDepends on number of rooms with UFH | \n
Most installations are completed within a single working week. Your installer should give you a clear timeline before work begins.
\n\nBest Time of Year to Install a Heat Pump in Ireland
\n\nThe ideal window is late spring through early autumn (April to September). Here is why:
\n\n- \n
- Less disruption: You are without heating for 1–2 days during installation. This is far more tolerable in May than in January. \n
- Installer availability: The busiest period for heat pump installers is September to December, when homeowners panic about winter. Book in spring or summer for better scheduling flexibility. \n
- Commissioning advantage: Installing in autumn means the heating season begins shortly after, giving you and your installer the chance to fine-tune settings while conditions change. \n
- Grant timing: SEAI grant applications can take 4–8 weeks to process. Apply in early spring and you will be ready for a summer installation. \n
That said, a competent installer can work year-round. If winter is your only option, plan for temporary heating during the installation days.
\n\nCommon Installation Problems and How to Avoid Them
\n\nHaving spoken with homeowners and installers across Ireland, these are the issues that come up most frequently:
\n\n1. Undersized Radiators Left in Place
\nSome installers, eager to keep costs down, leave existing radiators in place without verifying they can deliver enough heat at lower flow temperatures. Result: the heat pump runs at higher temperatures to compensate, destroying efficiency. Insist on a room-by-room heat loss calculation.
\n\n2. No Powerflush Before Commissioning
\nOld heating systems contain sludge, rust, and debris. If this contaminated water circulates through your new heat pump, it can damage the heat exchanger within months. A powerflush is non-negotiable, not optional.
\n\n3. Weather Compensation Not Set Up
\nSome installers set a fixed flow temperature (e.g., 45°C) and walk away. This means the heat pump runs at the same intensity whether it is 15°C or 0°C outside. Weather compensation must be configured from day one.
\n\n4. Outdoor Unit Placed Too Close to Walls or Boundaries
\nHeat pumps need adequate airflow around the outdoor unit. Placing the unit in a tight corner, against a wall, or too close to a neighbour’s boundary causes noise complaints and reduces efficiency. Follow the manufacturer’s clearance specifications exactly.
\n\n5. Undersized Hot Water Cylinder
\nReplacing a 120-litre copper cylinder with a 150-litre heat pump cylinder might seem like an upgrade, but heat pumps heat water more slowly than boilers. Go for 200 litres minimum — 250+ for larger households.
\n\n6. No System Filter Installed
\nA magnetic filter on the return pipe catches metallic debris before it reaches the heat pump. It costs €100–€200 and can prevent thousands in repair bills. Make sure one is included.
\n\nChoosing the Right Installer
\n\nThe installer matters more than the brand of heat pump. A well-installed mid-range unit will outperform a premium unit that is poorly installed. Here is what to look for:
\n\nNon-Negotiable Requirements
\n\n- \n
- SEAI-registered contractor: This is mandatory if you want the grant. Check the SEAI contractor list at seai.ie. \n
- F-Gas certified: Required for handling refrigerants in split-system heat pumps. \n
- MCS or equivalent certification: Demonstrates competency in heat pump design and installation. \n
- Full insurance: Public liability and professional indemnity insurance. \n
Questions to Ask Before You Commit
\n\n- \n
- \"Will you carry out a room-by-room heat loss calculation?\" (The answer must be yes.) \n
- \"How will you set up weather compensation?\" (They should explain the heating curve process.) \n
- \"Will you return to fine-tune the system after a few weeks?\" (Good installers do this as standard.) \n
- \"What warranty do you provide on the installation workmanship?\" (Look for minimum 2 years, separate from the manufacturer’s product warranty.) \n
- \"Can you provide references from recent installations in my area?\" \n
Get at least three quotes. Be wary of any quote that is dramatically cheaper than the others — it usually means corners are being cut on radiator sizing, cylinder specification, or commissioning.
\n\nSEAI Grant Process for Heat Pump Installation
\n\nThe SEAI provides generous grants that can cover a significant portion of your heat pump installation cost. Here is the current breakdown for 2026:
\n\n| Grant Component | \nAmount | \n
|---|---|
| Heat pump system grant | \n€6,500 | \n
| Central heating system upgrade (radiators, pipework) | \n€2,000 | \n
| Renewable heat bonus | \n€4,000 | \n
| Maximum total grant | \n€12,500 | \n
Step-by-Step Grant Process
\n\n- \n
- Get quotes from SEAI-registered contractors. Only work done by registered contractors qualifies. \n
- Apply online through the SEAI portal. You will need your MPRN (electricity meter number), property details, and your chosen contractor’s details. \n
- Wait for approval. This takes 4–8 weeks. Do not start any work before receiving approval. If you do, you forfeit the grant. \n
- Have the work completed. Your contractor carries out the installation. \n
- Submit completion documentation. This includes a Declaration of Works, BER assessment, and proof of payment. \n
- Receive the grant. SEAI pays the grant directly to you (or in some cases, it is deducted from your invoice by the contractor). \n
Key Eligibility Requirements
\n\n- \n
- Your home must have been built and occupied before 2021. \n
- The Heat Loss Indicator (HLI) must be 2.3 or below. If it is above this threshold, you will need to improve your home’s insulation first (wall insulation, attic insulation, or window upgrades). \n
- You must use an SEAI-registered contractor. \n
- A BER assessment is required after installation. \n
- VAT on heat pump installations is currently 9% (reduced rate). \n
Post-Installation BER Assessment
\n\nAfter your heat pump is installed, a BER (Building Energy Rating) assessment is mandatory as part of the SEAI grant process. This independent assessment verifies the improvement to your home’s energy performance.
\n\nWhat to expect:
\n\n- \n
- A BER assessor visits your home (this is usually arranged by your installer or can be booked independently). \n
- They inspect the heat pump installation, insulation levels, windows, and other energy features. \n
- You receive an updated BER certificate showing your new rating. \n
- Most homes that switch from oil to a heat pump jump 2–3 BER grades (e.g., from D2 to B2 or better). \n
The BER assessment costs €150 – €300 and is a requirement for SEAI grant payment. Some installers include it in their package price.
\n\nAn improved BER adds measurable value to your property. Research from the ESRI shows that each BER grade improvement adds approximately 1.5–2% to a home’s sale price.
\n\nReady to Start Your Heat Pump Installation?
\nTell us about your home and we will match you with SEAI-registered installers who know what they are doing.
\n\nFrequently Asked Questions
\n\nHow much does a full heat pump installation cost in Ireland in 2026?
\nA complete air-to-water heat pump installation typically costs €9,000 – €18,000 before grants, depending on the size of the system, radiator upgrades needed, and pipework modifications. After the maximum SEAI grant of €12,500, your net cost could be as low as €2,000 – €6,000. VAT is charged at the reduced rate of 9%.
\n\nDo I need planning permission for a heat pump in Ireland?
\nMost domestic air-to-water heat pump installations are exempt from planning permission under the Planning and Development Regulations. However, exemptions have conditions: the outdoor unit must not exceed certain noise levels at the boundary, and there are setback requirements. If your home is a protected structure or in an architectural conservation area, check with your local authority first.
\n\nCan I keep my existing radiators with a heat pump?
\nPossibly. It depends on the size of your existing radiators relative to the heat loss of each room. Your installer should calculate this during the design phase. In many homes built after 2000, existing double-panel radiators are adequate. In older homes, some or all radiators may need upgrading to deliver enough heat at the lower flow temperatures a heat pump uses.
\n\nWill a heat pump work with my existing hot water cylinder?
\nAlmost certainly not. Standard copper cylinders are too small and have coils that are too small for efficient heat transfer at heat pump flow temperatures. You will need a dedicated heat-pump-compatible cylinder — typically 200–300 litres with an oversized coil. This is factored into most installation quotes.
\n\nWhat happens if my HLI is above 2.3?
\nIf your home’s Heat Loss Indicator is above 2.3, you will not qualify for the SEAI heat pump grant until you improve your insulation. Common upgrades include cavity wall insulation, external wall insulation, attic insulation top-up, or window replacement. SEAI also offers grants for these insulation measures, and many homeowners complete insulation upgrades first, then apply for the heat pump grant. Your installer or BER assessor can advise on the most cost-effective route to getting your HLI below the threshold.
\n\nHow long does the full process take from application to a working heat pump?
\nAllow 8 – 16 weeks from initial enquiry to a fully operational system. This breaks down as: 1–2 weeks for quotes and home assessment, 4–8 weeks for SEAI grant approval, and 2–5 days for the installation itself. During peak season (September – December), installer waiting lists can add 4–6 weeks. Applying in spring gives you the best chance of a smooth, fast process.
\n\nFinal Thoughts
\n\nA heat pump installation is a significant project, but it is not as daunting as many homeowners fear. The key is choosing the right installer — someone who takes the time to design the system properly, sizes your radiators correctly, commissions the unit with weather compensation, and comes back to fine-tune it.
\n\nWith SEAI grants covering up to €12,500 of the cost and VAT at just 9%, there has never been a better time to make the switch. The installation takes 2–5 days, and the result is a home that is warmer, quieter, cheaper to run, and significantly more valuable.
\n\nIf you are ready to take the next step, request a free quote from SEAI-registered installers in your area. No obligation, no hard sell — just honest advice on what your home needs.
\n\nRelated Articles
Air to Air Heat Pumps Ireland 2026: Costs, vs Air-to-Water & Why There's No SEAI Grant
Air-to-air heat pump costs Ireland 2026: €1,200-€11,000 installed. Why there's no SEAI grant, vs air-to-water, best brands and when they make sense.
Air to Water Heat Pumps Ireland 2026: Costs, Grants & Best Brands Compared
Complete guide to air to water heat pumps in Ireland. Costs from €1,500 after SEAI grants of €12,500. Compare Daikin, Nibe, Grant, Samsung, Vaillant, Mitsubishi.
SEAI One Stop Shop: Complete Guide to Home Retrofitting in Ireland 2026
Complete guide to the SEAI One Stop Shop scheme. Grants up to €30,000, all 32 providers, costs by house type, eligibility, and financing options for 2026.