
How Long Does It Take to Install Solar Panels in Ireland? The Full 2026 Timeline
You have decided to go solar. You have read about the SEAI grant, compared costs, and picked an installer. Now the question everyone asks: how long until the panels are actually on my roof and generating electricity? The honest answer is that the physical installation takes just one to two days — but the full process from first phone call to flipping the switch typically runs four to eight weeks. Here is every step, how long each one takes, and what can slow things down.
Ready to Start the Clock?
Get three quotes from SEAI-registered installers and kick off your solar project today.
The Full Timeline at a Glance
Before we break down each step, here is the typical timeline from start to finish for a standard residential solar installation in Ireland in 2026:
| Step | Duration | Running Total |
|---|---|---|
| 1. Get quotes & choose installer | 1–2 weeks | Week 1–2 |
| 2. Site survey | 1–2 hours (within 1 week) | Week 2–3 |
| 3. Apply for SEAI grant | 20 working days for approval | Week 3–7 |
| 4. System design & ordering | 1–2 weeks (concurrent with grant) | — |
| 5. Physical installation | 1–2 days | Week 7–8 |
| 6. ESB Networks NC6 notification | 1–3 weeks | Week 8–10 |
| 7. Post-works BER & grant drawdown | 4–6 weeks for payment | Week 10–16 |
Key point: Your panels start generating electricity on installation day (step 5). Steps 6 and 7 happen after that — they affect your grid export payments and grant refund, not your ability to use solar power. Most homeowners are generating free electricity within 6–8 weeks of their first phone call.
Step 1: Getting Quotes (1–2 Weeks)
This is the step most people either rush or agonise over. Here is the practical approach:
Get at least three quotes. This is not just good practice — it is essential. Solar pricing in Ireland varies wildly. We regularly see a €2,000–€3,000 gap between the cheapest and most expensive quote for the exact same 4 kWp system. Three quotes give you enough data to spot outliers in both directions.
What a good quote includes:
- Exact system size in kWp (not just “10 panels”)
- Panel brand, model, and wattage
- Inverter brand and model
- Estimated annual yield in kWh
- Total cost including VAT (should be 0%)
- What is included: scaffolding, electrical work, ESB notification, BER assessment
- Warranty terms for panels, inverter, and workmanship
What to watch out for: Quotes that are significantly below market rate often mean budget panels with shorter warranties, or the quote excludes scaffolding, electrical certification, or the post-works BER. Always compare like-for-like.
You can request quotes through our service and typically receive three competitive quotes within 24–48 hours.
Step 2: The Site Survey (1–2 Hours)
Once you have chosen an installer, they will arrange a site survey — usually within a week. This is a physical visit where a surveyor (or the installer themselves) checks:
- Roof condition and structure: Can it support the weight? (Solar panels add roughly 12–15 kg/m² — less than a layer of slate tiles.) Are there any leaks, damaged tiles, or rot?
- Roof orientation and pitch: South-facing at 30–35° is ideal, but east-west splits work well too.
- Shading: Trees, chimneys, neighbouring buildings, or dormer windows that could block sunlight during peak hours.
- Electrical board: Is there space for the inverter isolator and generation meter? Older fuse boards may need upgrading (€300–€600).
- Access: Can scaffolding be erected safely? Is there vehicle access for delivery?
The survey typically takes 1–2 hours and is usually free. After the survey, the installer confirms (or adjusts) the system design and provides a final quote. This is the last chance to change system size, panel type, or add a battery before ordering begins.
Step 3: Applying for the SEAI Grant (Up to 4 Weeks)
If your home was built and occupied before 2021, you are eligible for the SEAI solar PV grant of up to €1,800. The application process goes like this:
- Apply online through the SEAI website. You need your MPRN (electricity meter point reference number), property details, and chosen installer’s details.
- Wait for your Letter of Offer. SEAI currently takes approximately 20 working days (4 calendar weeks) to process applications. You must not begin installation before receiving your Letter of Offer — starting early disqualifies you from the grant.
- Your Letter of Offer is valid for 8 months. Once approved, you have 8 months to complete the installation and submit your Declaration of Works.
Can you do anything during the wait? Yes. While the grant application is processing, your installer can:
- Finalise the system design
- Order panels, inverter, and mounting hardware
- Schedule the installation date
The only thing that cannot happen is the actual installation itself. Good installers will have your equipment ordered and a date pencilled in so they can start within days of your grant approval arriving.
What if you skip the grant? If your home does not qualify (built after 2020) or you simply do not want to wait, you can skip this step entirely. The installation can begin as soon as equipment is available — often within 1–2 weeks of signing the contract. This cuts the total timeline to roughly 3–4 weeks.
Step 4: System Design & Equipment Ordering (1–2 Weeks)
This step runs concurrently with the grant application, so it does not add time to the overall process. Your installer will:
- Create a detailed system design based on the site survey, including panel layout, wiring routes, inverter placement, and mounting system specification.
- Order the equipment. Most Irish installers keep popular panels (JA Solar, Trina, LONGi, Hyundai) and inverters (SolarEdge, Huawei, GivEnergy) in stock. Specialist or premium brands may take 1–2 weeks to arrive.
- Arrange scaffolding. For most two-storey houses, scaffolding is required by health and safety regulations. Scaffolding companies can usually schedule within a week.
If you are adding a battery, delivery times vary. GivEnergy and Huawei batteries are typically available within a week. Tesla Powerwalls can take 2–6 weeks depending on stock levels.
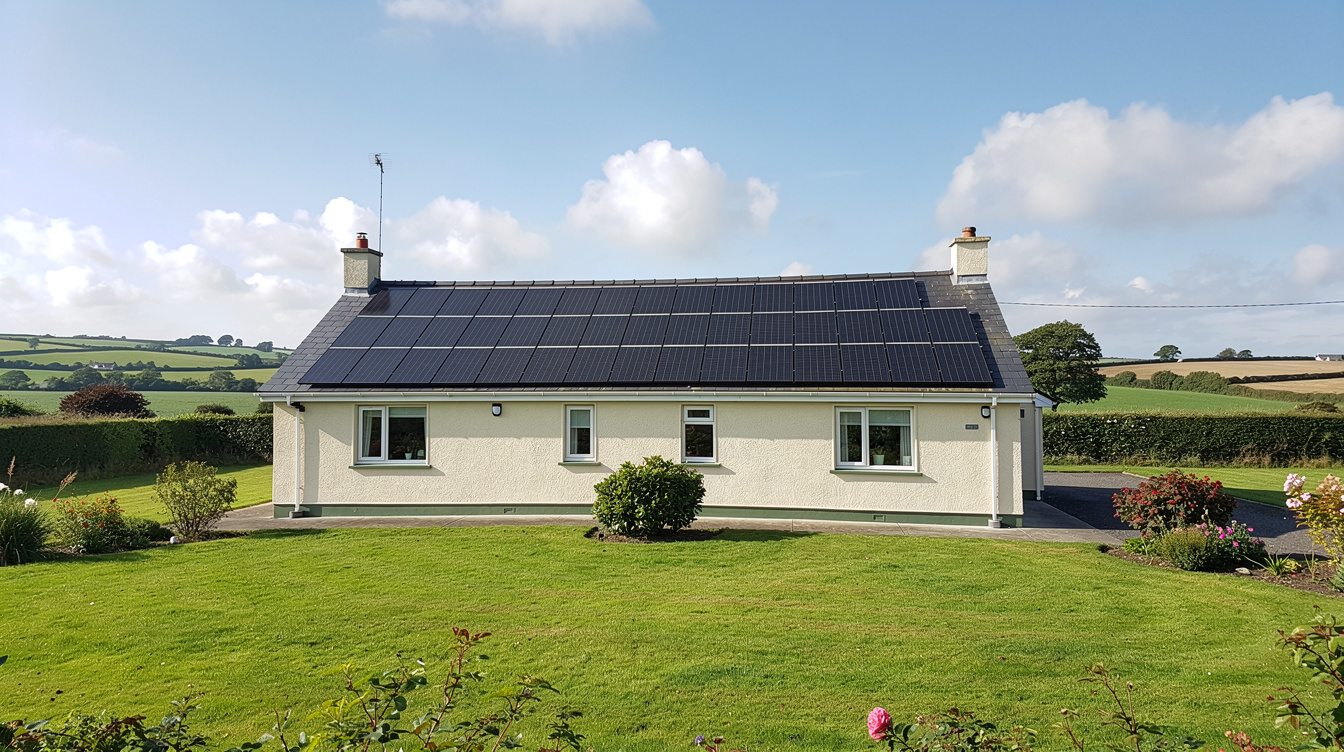
Step 5: Installation Day (1–2 Days)
This is the part everyone imagines when they think about “getting solar.” Despite all the planning that leads up to it, the physical installation is remarkably quick.
Day 1 (the main event):
- Morning (8:00–9:00): Crew arrives (typically 2–3 installers), scaffolding goes up (if not erected the day before), and equipment is unloaded.
- Mid-morning (9:00–12:00): Mounting rails are fixed to the roof rafters using specialised brackets. The rails are levelled and secured. This is the most time-consuming part of the roof work.
- Afternoon (12:00–15:00): Panels are carried up and clipped onto the rails. A 10-panel system takes roughly 60–90 minutes to mount once the rails are in place. DC cabling is run from the panels down to the inverter location.
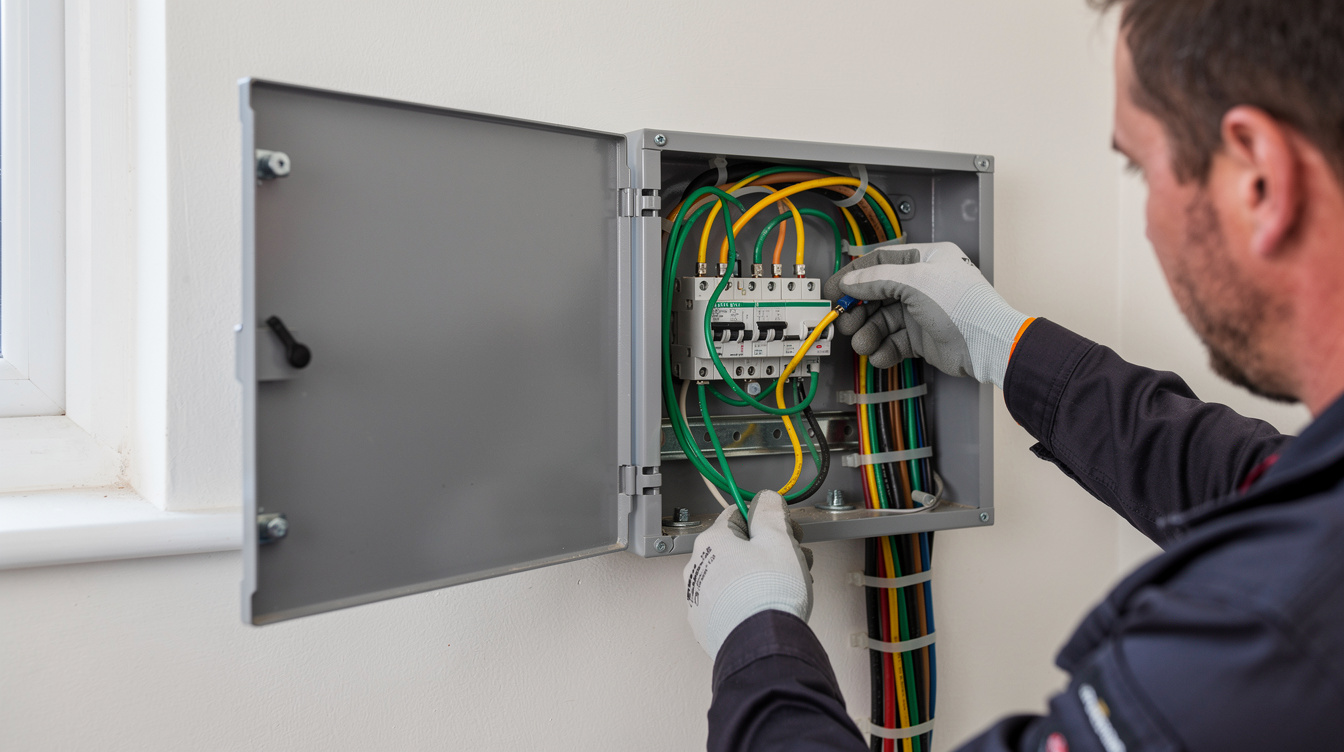
- Late afternoon (15:00–17:00): The inverter is mounted (usually in the utility room, garage, or attic), connected to the panel array, and wired into the consumer unit. The electrician completes the AC wiring, isolator switches, and generation meter.
Day 2 (if needed): Larger systems (6+ kWp), battery installations, or homes with complex roof layouts may spill into a second day. The battery adds roughly 3–4 hours to the install. Testing, commissioning, and handover also happen on the final day.
What happens during the install:
- Your electricity will be switched off for 30–60 minutes while the inverter is connected to the consumer unit. The installer will warn you in advance.
- There will be some noise — mostly drilling into roof rafters and the occasional hammer. It is not as loud as you might fear.
- The crew will need access to the attic or wherever the cable route runs from roof to inverter.
- At the end, the installer will walk you through the system, show you the monitoring app, and explain how to read your generation data.
| System Type | Typical Install Time | Crew Size |
|---|---|---|
| Small system (2–3 kWp, 5–8 panels) | 4–6 hours | 2 people |
| Standard system (3–5 kWp, 8–12 panels) | 1 day | 2–3 people |
| Large system (5–8 kWp, 12–20 panels) | 1–1.5 days | 3 people |
| System with battery | Add 3–4 hours | +1 electrician |
| Commercial (10–50 kWp) | 2–5 days | 3–5 people |
Get Installed in Weeks, Not Months
Compare quotes from SEAI-registered installers with fast turnaround times.
Step 6: ESB Networks NC6 Notification (1–3 Weeks)
After installation, your installer submits the NC6 form to ESB Networks. This is the microgeneration notification that registers your solar system on the grid. Key facts:
- Who submits it: Your installer (it must be done by a qualified electrician)
- When: After installation is complete
- Cost: Free for systems under 6 kW (single-phase) or 11 kW (three-phase)
- Processing time: Typically 1–3 weeks
What the NC6 enables: Until ESB Networks processes your NC6 and a smart meter is in place, your electricity supplier cannot register your exports. This means you will not receive Clean Export Guarantee payments for surplus electricity until this step is complete. However, you are still using your solar electricity and saving money from day one — you just are not earning from exports yet.
Smart meter note: If you do not already have a smart meter, ESB Networks will schedule an upgrade. In most urban areas, this happens within a few weeks. Some rural areas may have longer wait times. You do not need a smart meter to use your solar — only to receive export payments.
Step 7: Post-Works BER & Grant Drawdown (4–6 Weeks)
If you applied for the SEAI grant, there are two final steps before you receive your money:
- Post-works BER assessment: An SEAI-registered BER assessor visits your home to verify the installation and update your BER certificate. This typically costs €150–€200 (some installers include it in their price). The visit takes about an hour.
- Submit Declaration of Works: Your installer submits the completion paperwork to SEAI, including the updated BER certificate, electrical compliance documentation, and proof of payment.
- SEAI processes the grant: Allow 4–6 weeks from submission for the grant to be deposited in your bank account.
Remember: This step happens after your panels are installed and generating electricity. The grant drawdown timeline does not affect when you start saving money — it affects when you get the €1,800 refund.
What Can Delay the Process?
The 4–8 week timeline assumes everything goes smoothly. Here is what can add time:
| Potential Delay | Time Added | How to Avoid |
|---|---|---|
| SEAI grant backlog (busy periods) | 2–4 extra weeks | Apply early in the year (Jan–Mar) |
| Installer fully booked | 2–8 weeks | Book during autumn/winter (quieter season) |
| Roof repairs needed | 1–3 weeks | Get roof inspected before starting the process |
| Electrical board upgrade | 1–2 days (usually done on install day) | Installer should flag this at survey stage |
| Planning permission required | 8–12 weeks | Rare — only for listed buildings or apartments |
| Battery out of stock | 2–6 weeks | Install panels first, add battery later |
| Bad weather | 1–5 days | Allow flexibility in scheduling; spring/summer best |
The biggest delay factor in 2026 is installer availability. Solar demand in Ireland has surged, and the best installers are often booked 4–8 weeks out during peak season (March–August). If you want summer installation, start the quote process in January or February.
The Fastest Possible Timeline
If you do not need the SEAI grant (either your home does not qualify or you prefer speed), here is the fastest realistic path:
- Day 1: Request quotes
- Day 2–3: Receive and compare quotes
- Day 4: Choose installer, sign contract
- Day 5–7: Site survey
- Week 2: Equipment ordered and delivered
- Week 2–3: Installation day
Total: 2–3 weeks from first call to generating electricity. This is achievable if your installer has stock, your roof is in good condition, and you are flexible on scheduling.
When Is the Best Time of Year to Install?
There is a common misconception that you should wait until summer to install solar panels. In reality, the best time to install and the best time to generate are different things:
| Season | Install Advantage | Install Disadvantage |
|---|---|---|
| Autumn/Winter (Oct–Feb) | Shorter wait times, some installers offer discounts | Shorter daylight hours, more weather cancellations |
| Spring (Mar–May) | System ready for peak summer generation | Installer demand starts rising, book early |
| Summer (Jun–Aug) | Best weather for roof work, long daylight | Peak demand — longest wait times, highest prices |
Our recommendation: Start the process in autumn or early winter. Apply for the SEAI grant in October or November, book your installer for February or March, and have your system generating at full capacity by April when Ireland’s solar output starts climbing steeply. You will have the system paid off sooner than if you wait until summer to even start looking.
Common Questions
Do I need to be home during installation?
You should be available for the start (to let the crew in and discuss any last-minute details) and the end (for the handover and system walkthrough). You do not need to be present all day — the crew works independently.
Will the installation damage my roof?
No. Modern mounting systems use brackets that fix into the roof rafters (not the tiles). The tiles are lifted, brackets fixed, and tiles replaced around them. Done correctly, the roof remains fully weatherproof. Ask your installer about their approach and whether they provide a roof warranty. Read more in our step-by-step installation guide.
Can I install solar in winter?
Absolutely. Panels are installed dry — there is no wet work involved. The only weather limitation is high winds (above 40 km/h), which makes roof work unsafe. Installers routinely work through Irish winters.
What happens if the installer finds a problem during installation?
Occasionally, an installer discovers an issue that was not visible during the survey — hidden rot, undersized rafters, or an outdated electrical board. A good installer will stop, explain the issue, provide a cost to fix it, and get your approval before proceeding. This is one reason to choose an established, SEAI-registered installer rather than the cheapest quote.
Ready to Go Solar?
Get your free personalised quote from SEAI-registered installers.
Related Articles

Solar Panels Dublin 2026: Complete Installation Guide, Costs & Installers
Solar panels in Dublin 2026: real installation costs, yield figures, planning exemptions and how to choose from 100+ SEAI-registered Dublin installers.

Solar Panels for New Builds in Ireland 2026: What Developers Include, What You Should Upgrade & What It Costs
New build homes in Ireland come with solar panels under nZEB rules. Find out how much, whether to upgrade, costs, and why you can't get the SEAI grant.

Solar Panels for Farms Ireland 2026: TAMS III Grants, Costs & ROI for Irish Farmers
Complete guide to farm solar panels in Ireland. TAMS III covers 60% of costs. Typical payback 2.5-5 years with savings of €4,000-€15,000/year.