How Long Does Solar Panel Installation Take in Ireland? The Full Timeline (2026)
The panels go on your roof in a day. But the full process — from first inquiry to flipping the switch — takes 6–12 weeks. Here is exactly what happens at each stage and how to avoid delays.
It is one of the most common questions people ask before going solar: how long is this actually going to take?
The short answer: the physical installation takes 1–2 days for a typical home. But the full journey from “I want solar panels” to “my system is generating electricity” involves grant applications, ESB approvals, and paperwork that stretches the timeline to 6–12 weeks in total.
This guide walks through every stage so you know exactly what to expect — and which steps you can speed up.
The Complete Timeline at a Glance
| Stage | What Happens | How Long |
|---|---|---|
| 1. Get quotes | Contact installers, site survey, compare proposals | 1–2 weeks |
| 2. SEAI grant application | Installer submits grant on your behalf | 2–4 weeks for approval |
| 3. ESB Networks application | Installer applies for grid connection approval | 4+ weeks (20 working days min) |
| 4. Installation day | Panels, inverter, wiring installed | 1–2 days |
| 5. ESB meter upgrade | Smart meter installed (if needed) | 0–2 weeks |
| 6. BER assessment | Updated BER cert for grant drawdown | 1–2 weeks |
| 7. Grant payment | SEAI processes your grant | 2–4 weeks |
| Total | First inquiry to system generating | 6–12 weeks |
The good news: stages 2 and 3 usually run in parallel (your installer submits both at the same time), so the actual waiting time is shorter than it looks. And your system starts generating electricity the moment it is switched on after installation — you do not need to wait for the grant payment or BER assessment before it works.
Stage 1: Getting Quotes (1–2 Weeks)
Start by contacting 2–3 SEAI-registered installers. A good installer will:
- Ask about your electricity usage (have a recent bill handy)
- Check your roof orientation and pitch using satellite imagery or a site visit
- Recommend a system size based on your actual consumption
- Provide a written quote with panel brand, inverter model, warranty terms, and total cost
Most installers can provide an initial quote within 2–3 days of your enquiry. If a site visit is needed (for complex roofs, listed buildings, or battery installations), add another 3–5 days.
Speed tip: Have your last 12 months of electricity bills ready, plus photos of your roof and fuseboard. This gives installers everything they need to quote quickly without a site visit in most cases.
Get Your Free Solar Quote
Connect with SEAI-registered installers and get quotes within days, not weeks.
Stage 2: SEAI Grant Application (2–4 Weeks)
Once you have chosen your installer and agreed a quote, the installer submits the SEAI solar grant application on your behalf through the SEAI portal. The current grant is worth up to €2,100 for a solar PV system.
You must receive your grant offer letter before any installation work begins. Starting early is one of the most common reasons for grant rejection.
Processing times in 2026 are typically 2–4 weeks. During busy periods (spring and early summer), it can stretch to 4–6 weeks. Your installer will monitor the application and notify you when the offer letter arrives.
Stage 3: ESB Networks Approval (4+ Weeks)
Before connecting a solar system to the grid, your installer must apply to ESB Networks for connection approval (called an NC6 application). This is a legal requirement — you cannot connect a generating system to the national grid without it.
ESB Networks has a statutory processing time of at least 20 working days (roughly 4 weeks). In practice, simple residential applications are often processed faster, but it is wise to plan for 4–6 weeks.
Your installer typically submits the ESB application at the same time as the SEAI grant application, so these two waiting periods overlap. This is one of the key reasons why a good installer makes such a difference — an experienced one manages this timing so you are not waiting longer than necessary.
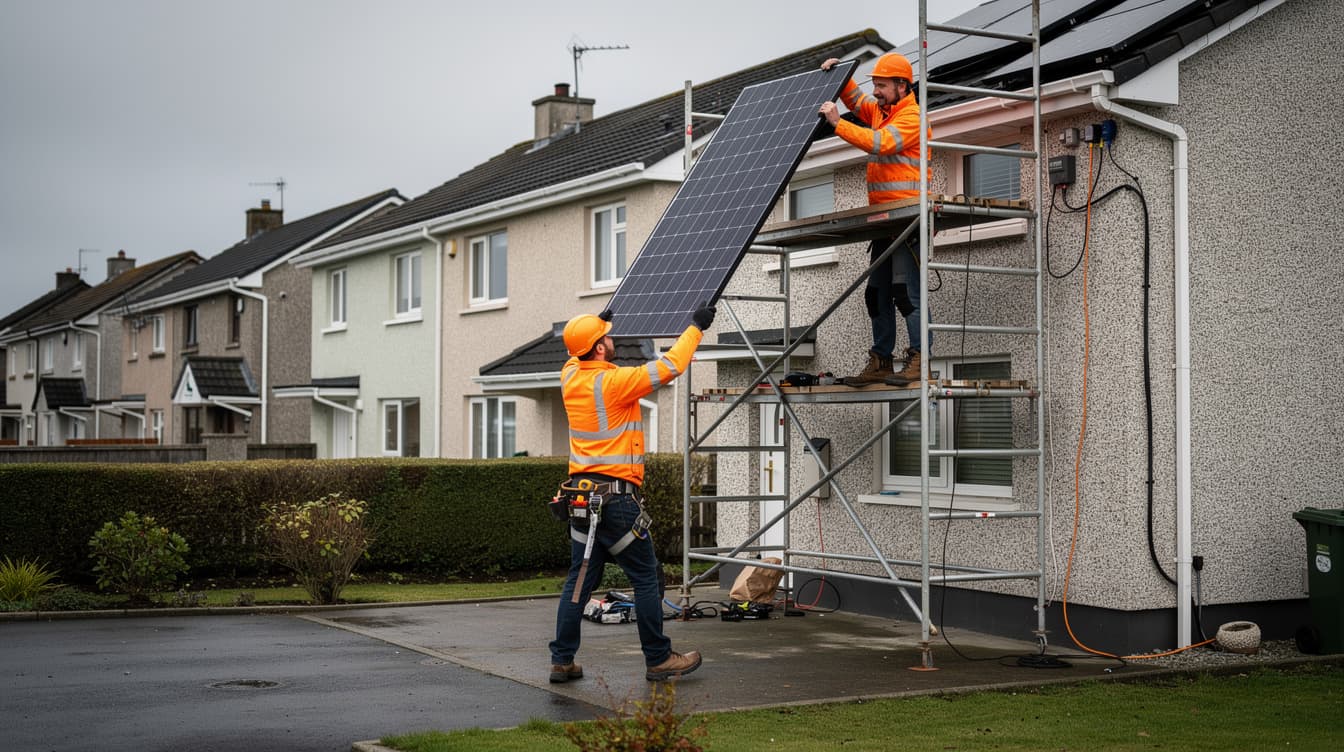
Stage 4: Installation Day — What Actually Happens
This is the exciting part. Here is a typical installation day for a standard residential system (8–16 panels):
Morning (8:00–9:00): Setup
- Installation crew arrives (usually 2–4 people)
- Scaffolding erected or ladders positioned (scaffolding is more common and safer)
- Materials and panels laid out
- Electricity may be briefly turned off while the inverter is connected
Mid-morning (9:00–12:00): Roof Work
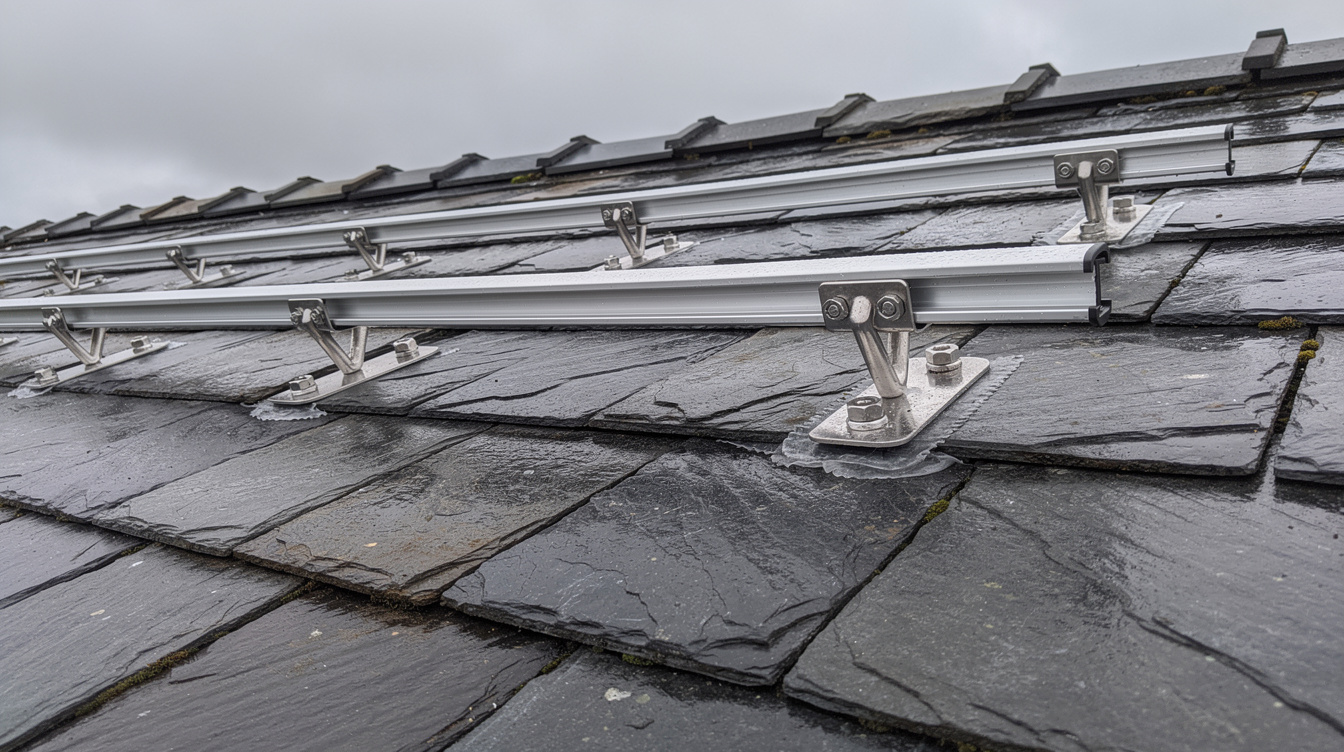
- Roof hooks or mounting brackets attached to rafters through the tiles or slates
- Aluminium rails fixed to the brackets
- Solar panels clipped onto the rails one by one
- DC cabling run from panels to the inverter location
Afternoon (12:00–15:00): Electrical Work
- Inverter mounted (usually in the attic, utility room, or garage)
- DC cables connected to the inverter
- AC output connected to your consumer unit (fuseboard)
- Generation meter installed
- If a battery is included, it is mounted and wired in (adds 2–3 hours)
Late afternoon (15:00–16:30): Testing and Handover
- System powered on and tested
- Installer checks all panels are generating correctly
- Monitoring app set up on your phone
- Walkthrough of how the system works, what the lights on the inverter mean, and how to read your generation data
- Paperwork signed
- Scaffolding removed, area tidied up
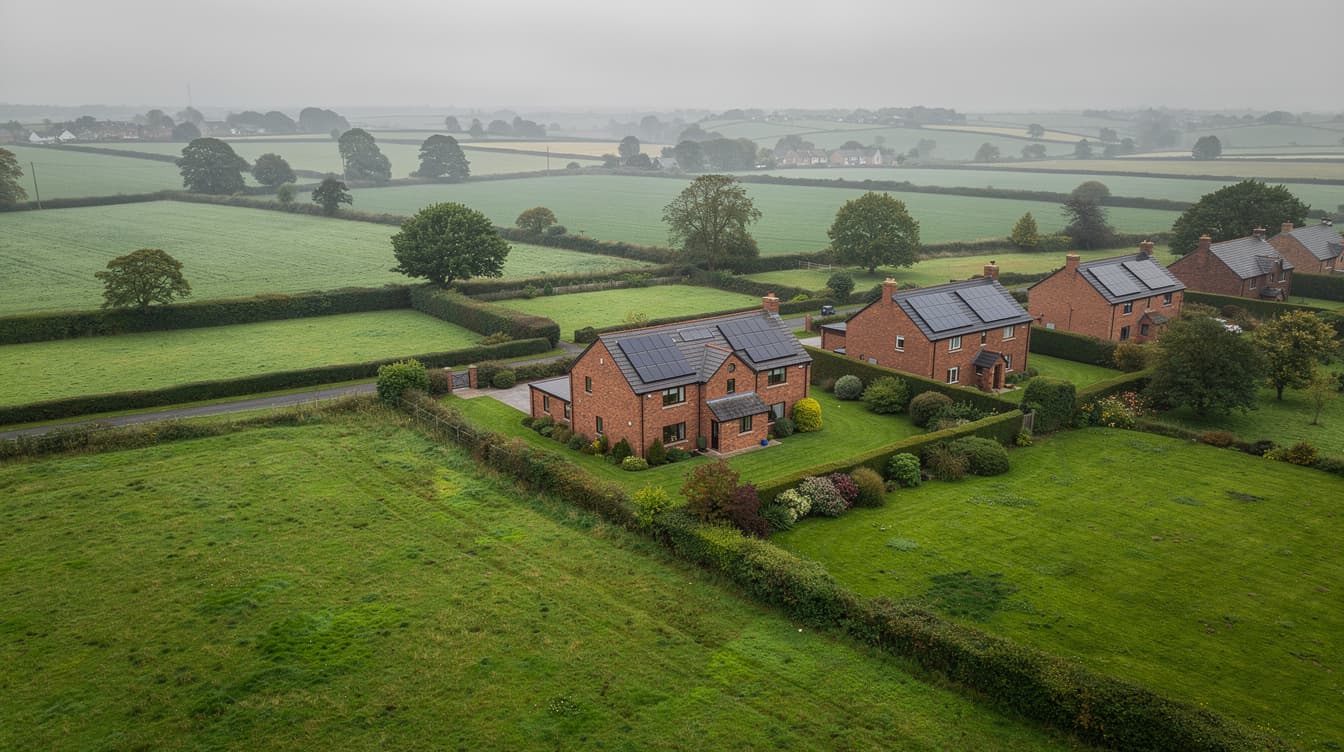
That is it. Your system is now live and generating electricity. From this moment, every unit of electricity your panels produce is a unit you do not pay for from the grid.
What about larger systems?
| System Size | Number of Panels | Installation Time |
|---|---|---|
| 2–3 kWp | 5–7 panels | Half a day |
| 4–5 kWp | 8–12 panels | 1 day |
| 6–7 kWp | 13–16 panels | 1–1.5 days |
| 8–10 kWp | 17–24 panels | 1.5–2 days |
| With battery | Any size | Add 2–3 hours |
Stage 5: Smart Meter Upgrade (0–2 Weeks)
To get paid for electricity you export to the grid under the Clean Export Guarantee, you need a smart meter. If you already have one (over 2 million Irish homes do), you can skip this step.
If you do not have a smart meter, ESB Networks will schedule an upgrade. This is free and usually happens within 1–2 weeks of your installation. The swap takes about 30 minutes and there is a brief power interruption.

Stage 6: BER Assessment (1–2 Weeks)
An updated BER (Building Energy Rating) certificate is required to draw down your SEAI grant. Your installer will advise you on booking a BER assessor after the installation is complete.
The assessment itself takes about an hour. The assessor inspects your home’s energy features (insulation, heating, windows, and now solar panels) and issues a new certificate. Solar panels typically improve your BER rating by 1–2 grades.
BER assessors can usually visit within 1–2 weeks of booking. Cost is typically €150–€250.
Stage 7: Grant Payment (2–4 Weeks)
Once your installer uploads the completion documentation and your new BER cert to the SEAI portal, the grant payment is processed. SEAI pays the grant directly to you (not to the installer), typically within 2–4 weeks.
The grant amount in 2026:
| System Size | SEAI Grant |
|---|---|
| Up to 2 kWp | €900 per kWp = €1,800 |
| 2–4 kWp | €1,800 + €300 per additional kWp |
| 4 kWp (max grant) | €2,400 |
Ready to Start Your Solar Journey?
Get free quotes from SEAI-registered installers. Most can begin the process within days.
What Can Cause Delays?
Most installations go smoothly, but some things can add weeks to the timeline:
Roof issues
If your roof needs repairs before panels can be mounted (broken tiles, rotten rafters, or old felt), this must be done first. An installer will flag this during the site survey. Budget an extra 1–3 weeks for roof work.
Scaffolding scheduling
Many installers use third-party scaffolding companies. During peak season (April–September), scaffolding availability can add a week to your installation date.
Fuseboard upgrades
Older homes may need a fuseboard (consumer unit) upgrade to accommodate the solar system safely. This is a half-day job but needs to be scheduled alongside or before the solar installation.
Planning permission (rare)
Most residential solar installations are exempt from planning permission. However, if your home is a protected structure, in an architectural conservation area, or you are installing ground-mounted panels over 25 m², you will need planning approval, which adds 6–10 weeks.
Peak season backlogs
Spring and summer are the busiest times for solar installers. In peak months, you may wait 4–8 weeks for an installation slot after your grants are approved. Booking in autumn or winter often means faster scheduling and the same system output over its 25-year lifetime.
How to Speed Things Up
If you want the fastest possible timeline, here is what you can do:
- Get quotes early. Start the process 2–3 months before your preferred installation date.
- Have your paperwork ready. Electricity bills, MPRN number, proof of address, and photos of your roof and fuseboard.
- Choose an experienced installer. An installer who handles the SEAI and ESB applications routinely will submit them faster and with fewer errors. See our guide to choosing an installer.
- Book off-peak. September–February installations often have shorter wait times.
- Respond quickly. When your installer asks for signatures or documents, send them the same day. Delays on your side add days to the timeline.
Do You Need to Be Home During Installation?
Yes, someone needs to be home for most of the installation day. The installers need:
- Access to your attic or utility room for inverter mounting
- Access to your fuseboard for electrical connections
- Your electricity will be off briefly (usually 30–60 minutes) during the final connection
- You will need to sign paperwork and receive the handover walkthrough at the end
Most installers arrive between 7:30 and 8:30am and finish by 4:00–5:00pm. It is a full working day, but you do not need to supervise — just be available when needed.
What Happens After Installation?
Once your system is live, it starts working immediately. Here is what to do in the first few weeks:
- Set up monitoring. Download the monitoring app (most inverters come with one — SolarEdge, Enphase, Huawei, etc.) and check your generation daily for the first week to make sure everything is working.
- Register for export payments. Contact your electricity supplier to register for the Clean Export Guarantee so you get paid for surplus electricity.
- Update your tariff. Some suppliers offer special solar tariffs with higher export rates. Shop around — see our best electricity tariff for solar guide.
- Keep documentation. Store your warranty certificates, installation certificate, and BER report somewhere safe. You will need them if you sell the house or make a warranty claim.
Ready to Go Solar?
Get your free personalised quote from SEAI-registered installers.
Related Articles

Solar Panels Meath 2026: Costs, Boyne Valley Planning, TAMS 3 & Installers
Solar panels Meath 2026 — costs by area, €1,800 SEAI grant, Newgrange/Tara/Trim planning realities, TAMS 3 dairy economics.
Solar Panels Kildare 2026: Costs, Yields, Battery Payback & Installers
Solar panels Kildare 2026 — costs by area, €1,800 SEAI grant, best battery payback in Ireland for commuter homes, TAMS 3 for stud farms.

Solar Panels Mayo 2026: Costs, Yields, Storm Mounting & Installers
Solar panels Mayo 2026 — costs by area, €1,800 SEAI grant, wind zone 5 mounting, TAMS 3 for east Mayo dairy. 6–8yr payback.